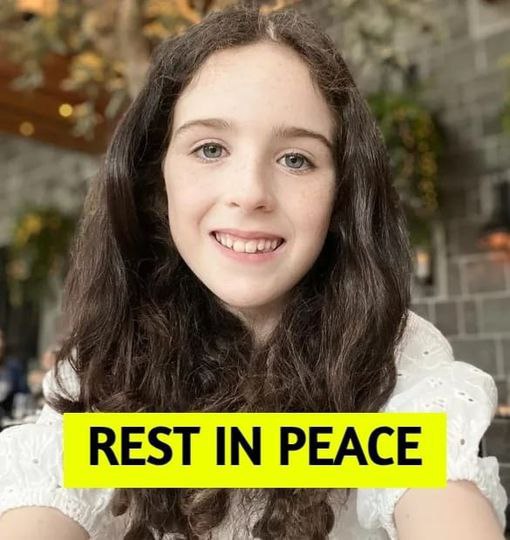
The brave girl from Galway, whose appearance on the Toy Show won hearts across the country, died on Tuesday, her family said this morning.
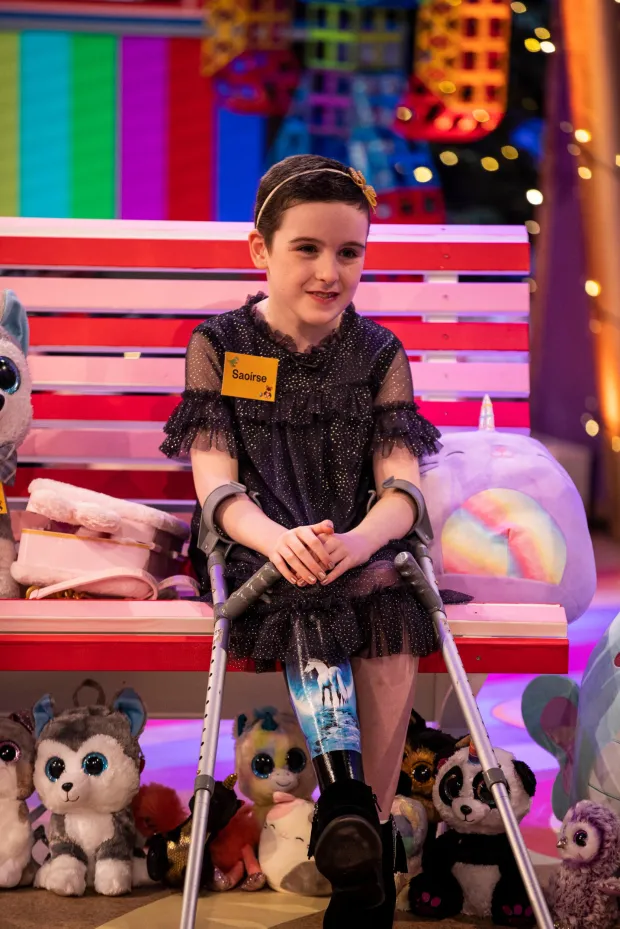
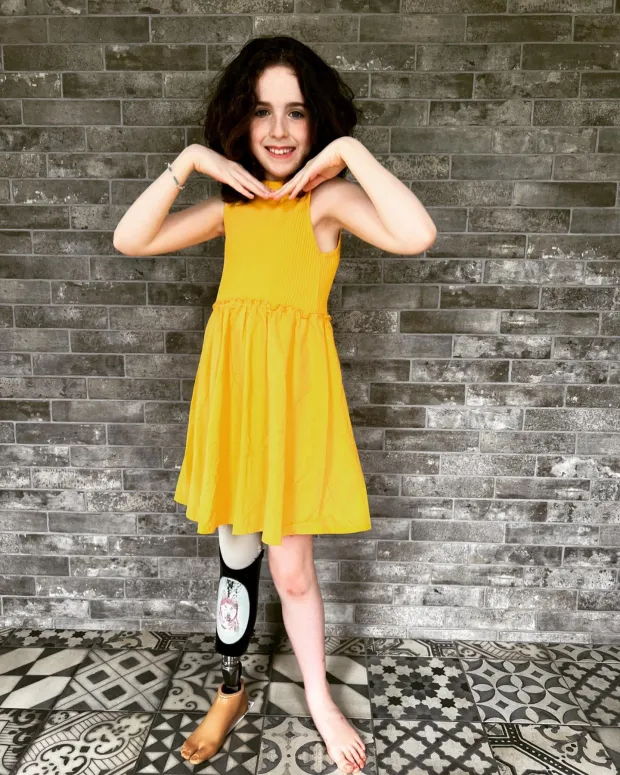
Saoírse was diagnosed with cancer in November 2019 after complaining of an injured ankle. In 2020, her leg was cut off because an Osteosarcoma tumor in her tibia was found to be cancerous and likely to kill her.
When Saoírse joined Ryan Tubridy on the Late Late Toy Show in 2020, her story became well known.
The Galway girl’s fight against a rare form of bone cancer amazed everyone with how strong and tough she was.

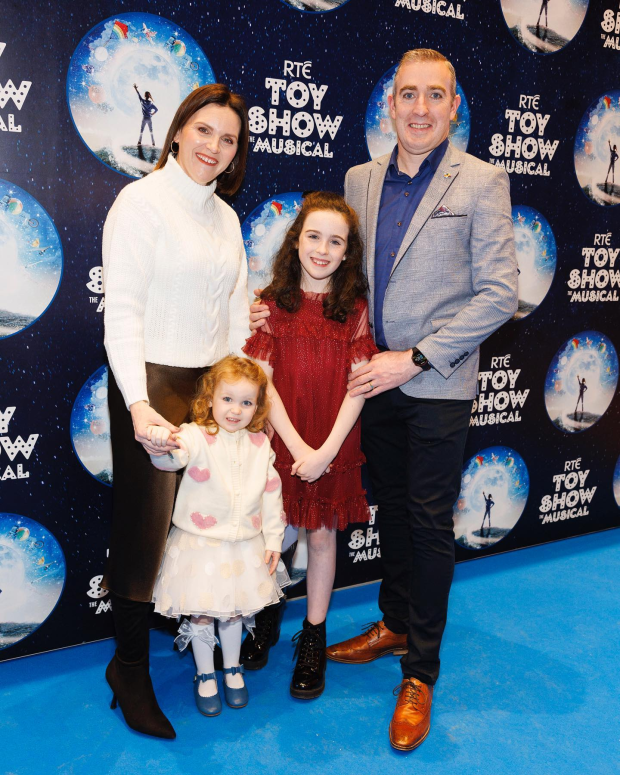
The death of Saoírse has broken the hearts of her parents, Roseanna and Ollie, and her little sister Farrah-Rose.
They told everyone about their terrible loss by saying, “After a long brave and dignified battle, our hearts are shattered to tell you that our beautiful little Saoírse took her last breath in our arms on Tuesday.”
“Thank you to all of our wonderful fans for thinking about Saoírse and us over the past few weeks.
“Today, we also think of you because we know how much the country loved Saoírse and how she changed the lives of so many people.”
“Cancer, you took her away from us. You also took away our dreams and the life we had.” Things will never be the same!
“Please give us some space as we go on our last and final trip with our beautiful girl. “Farrah Rose and Mamma Dadda.”
President Michael D. Higgins and stars from all over show business have paid tribute to the beloved girl. Her story was told on The Toy Show the first year they started their huge charity campaign.
through her battle, Saoírse’s family gave a “devastating” health update in November of last year, saying that her cancer had spread.
After a recurring tumor was found in her left lung earlier in 2023, they said it was a “huge shock” to them that the cancer had spread to her other lung.
It was Saoírse’s “biggest battle to date” because she had to go through more chemotherapy.
In April, Roseanna said, “Little did they know that their world was about to fall apart again.”
“To say we’re devastated just doesn’t cover it,” she said. It’s not fair that she’s been to war so many times and fought so hard.
Saoírse had already had a few dreams come true, like going to Old Trafford to see Manchester United play and going on her dream vacation to Disneyland.
When people heard that Saoírse had died, they sent her a lot of tributes.
The office of President Michael D. Higgins said, “President Higgins has sent his deepest condolences to the family of Saoírse Ruane from Kiltullagh, Co. Galway, after her death at the age of 12.” Everyone was moved by Saoírse’s strength and kindness.
Tanaiste Micheal Martin also said, “Very saddened by the death of Saoírse Ruane.”
“I will always remember meeting Saoirse and her mother Roseanna in Croke Park and seeing her beautiful smile and love for GAA.”
“The Toy Show Appeal is an amazing thing she left behind.” We’re very sorry for her family and friends’ loss.
Tubs’ tears
After Saoirse’s appearance on The Toy Show, Ryan Tubridy, who used to host Late Late, became friends with her family. He said that the “world is a poorer place” without her.
According to him, hearing the news of his dear young friend Saoírse Ruane’s death made him feel the saddest thoughts possible.
“As soon as we met, we became friends.” People all over the country fell in love with her, and because of her, a charity was founded. Through this, she helped make the lives of thousands of Irish children better and more hopeful.
“A child who is selfless, humble, kind, hopeful, and thoughtful.” She was everything our country should and could be, and her death will make a lot of us think about things.
“My condolences and all the love I can muster go out to Roseanna, Ollie, and Farrah Rose. They are a beautiful family whose whole world has been turned upside down by this tragedy.”
“Thank them for letting us all know about their amazing Saorse.”
“The world is a poorer place without Saoírse but I do hope that twinkle in her eye shines on and on.”
The legacy of Saoírse
Roz Purcell, a radio host on RTE 2FM, said, “No one will forget Saoírse; she left a huge mark and mark on Ireland.”
“In 12 years, she did so much.” May she rest in peace. Think about all of her family and friends who will miss her a lot.
Patrick O’Mahony, the captain of Ireland’s rugby team, said, “I’m very sorry to read this.” She was an inspiration.
Rosana, I’m so sorry, said Kathryn Thomas of RTE. Your lovely daughter made our lives so much better.
“A small part of what she brought into your life.” That smile is great. Thinking about all of you. “Take it easy, little angel.”
Today FM It was DJ Declan Pierce who wrote, “My beautiful friend. It breaks my heart so much.
“The best thing about my job is getting to know Saoírse through the radio show. From the bottom of my heart, I love you all the time.
Singer RuthAnne wrote on her blog, “Heartbroken. She was truly unique, and her bravery knew no bounds.”
“I am so thankful that I met her and had the chance to sing with her. What an honor!”
“That is something I will always treasure and hold close to my heart. Lots of love and light to everyone.”
Saoirse’s funeral will be held at St. Peter and Paul’s Church, Kiltullagh, on Sunday at 1.45 p.m.
It also said, “Saoírse will rest at home on Friday, March 8, from 2 p.m. to 8 p.m.”
“From the Bullaun Church parking lot (H62 YH66), a bus service will leave. Please follow the stewards’ instructions and only use the bus service to get to the event.”


 ” a social media user gushed. “Gorgeous!!! A photocopy of her mama,” an Instagrammer agreed. “Wow, she is her mom’s twin!” someone else wrote. “I thought this was her mom
  ,” another added.


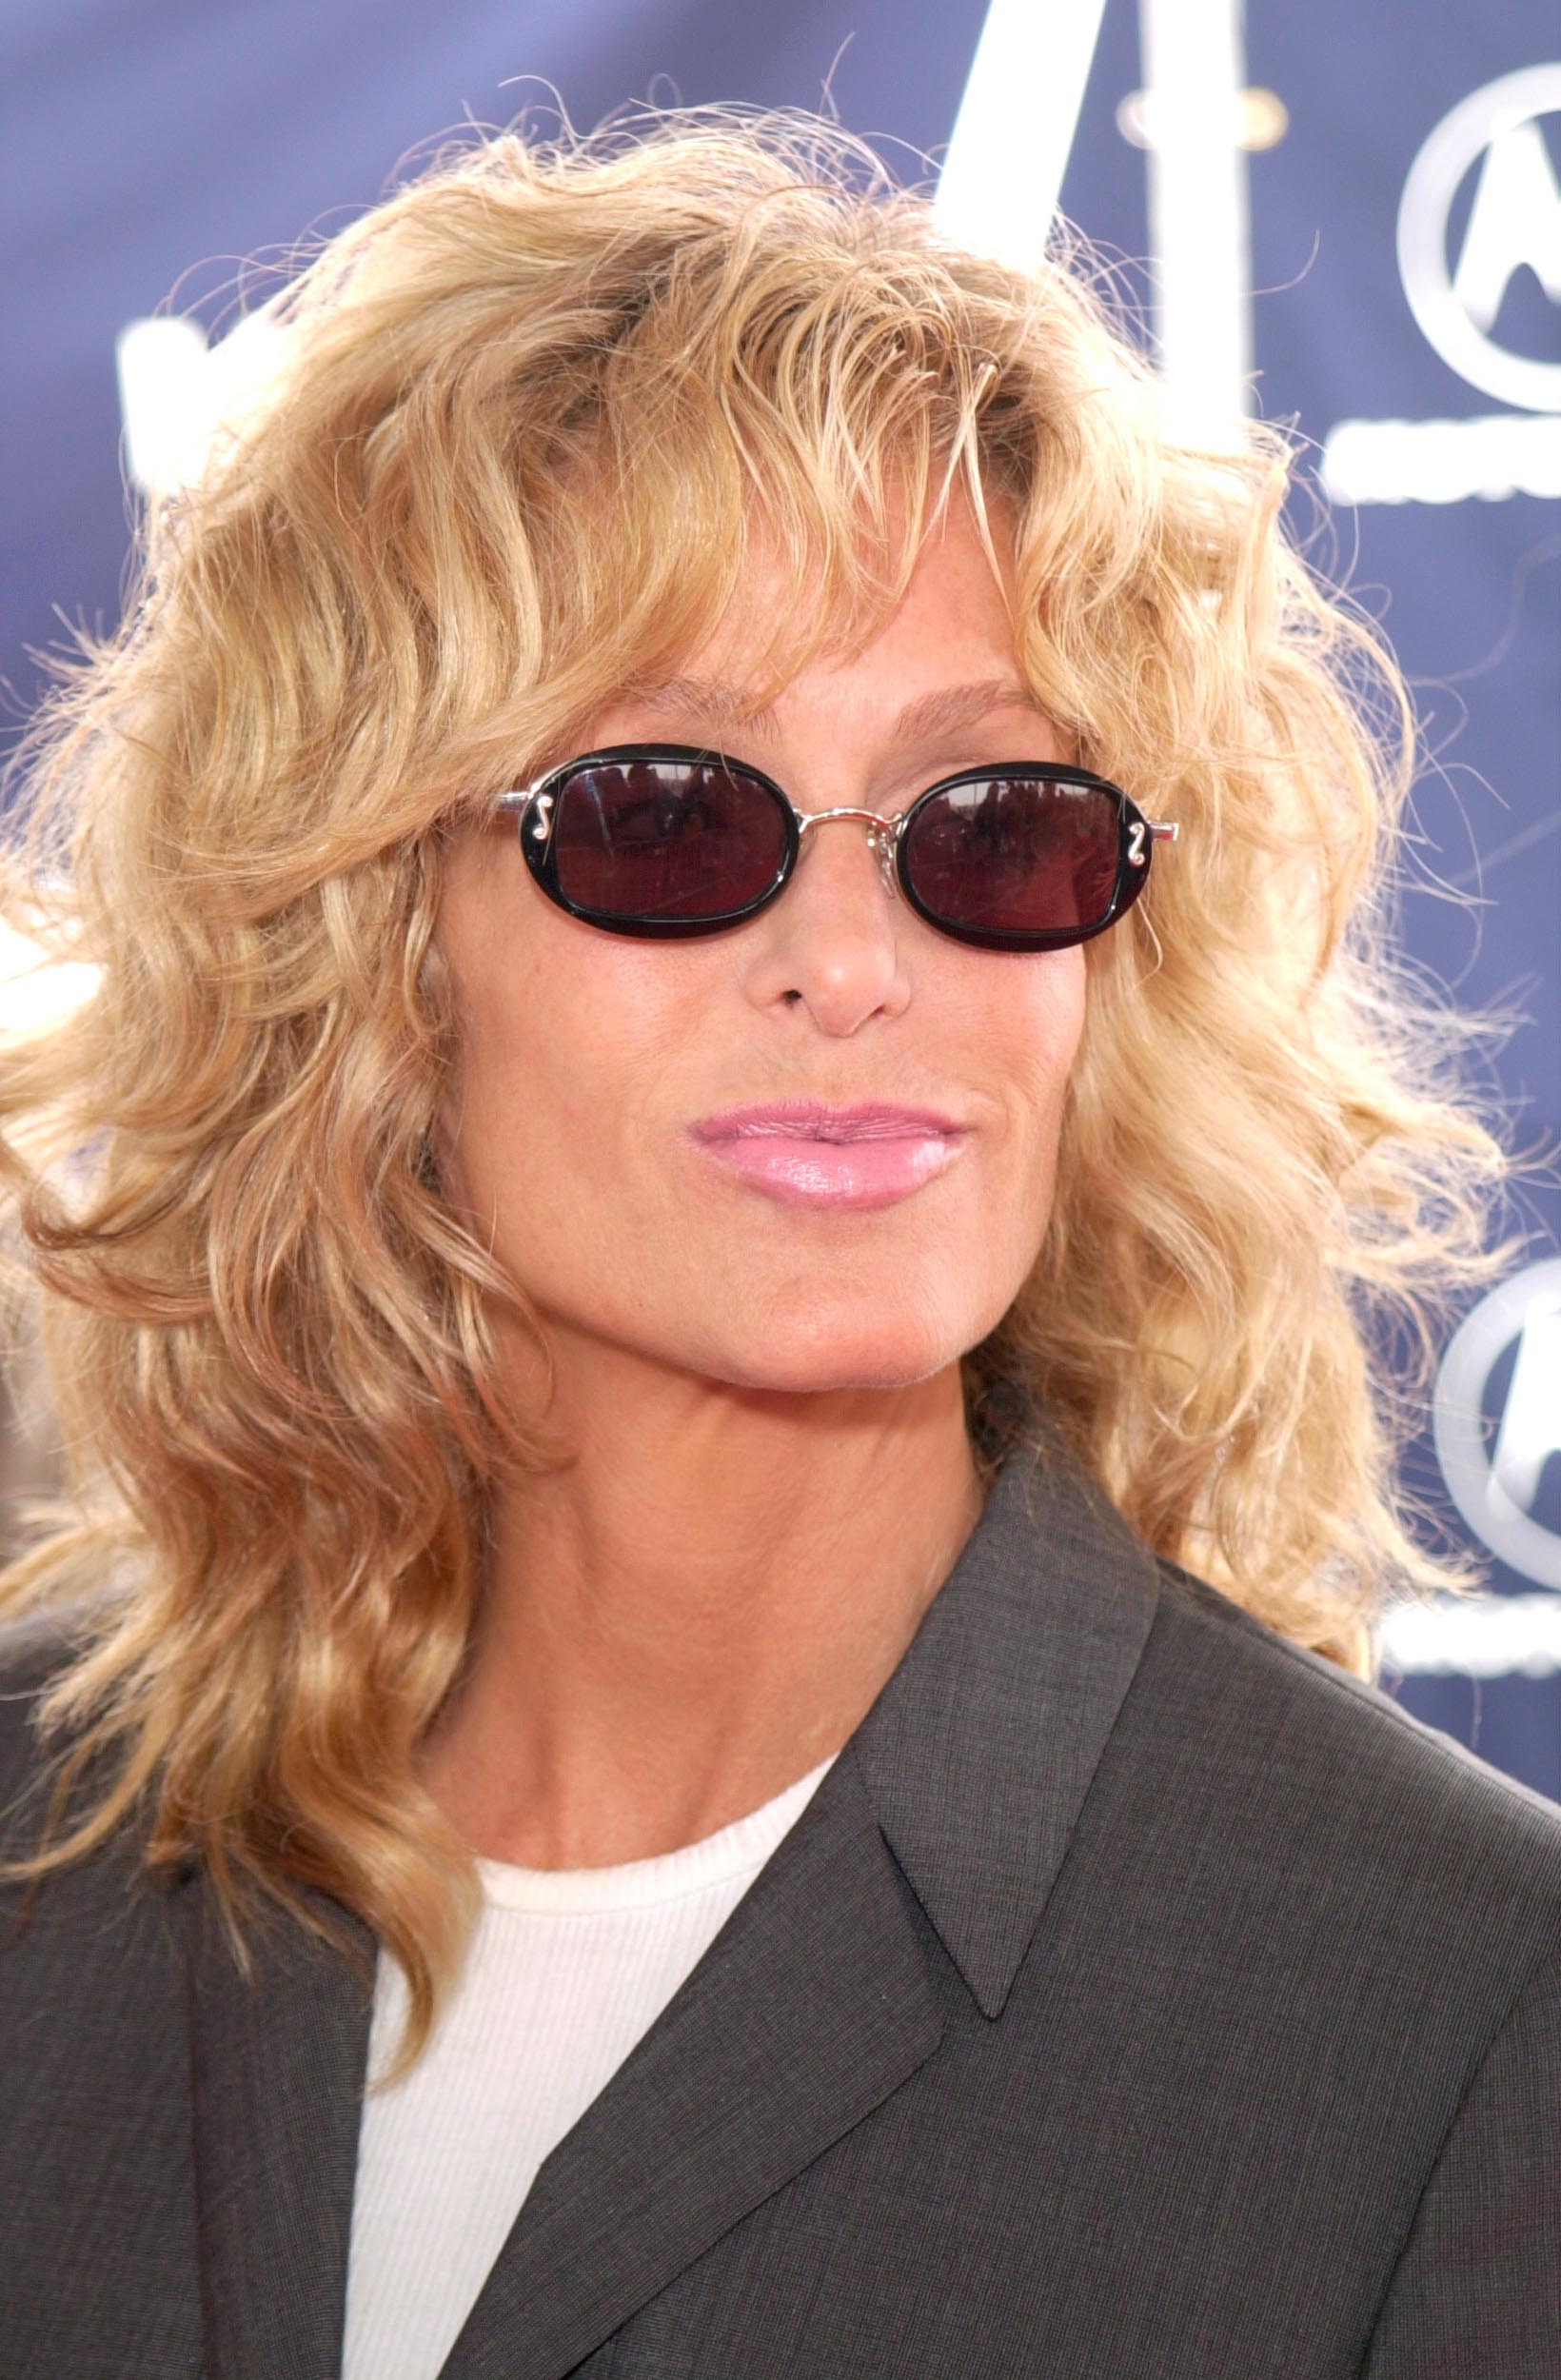 In the 1990s, she entered into a tumultuous relationship with actor Ryan O’Neal, which was marked by chaos. The most heartbreaking aspect of this relationship was her eventual decision to end it due to a shocking discovery.
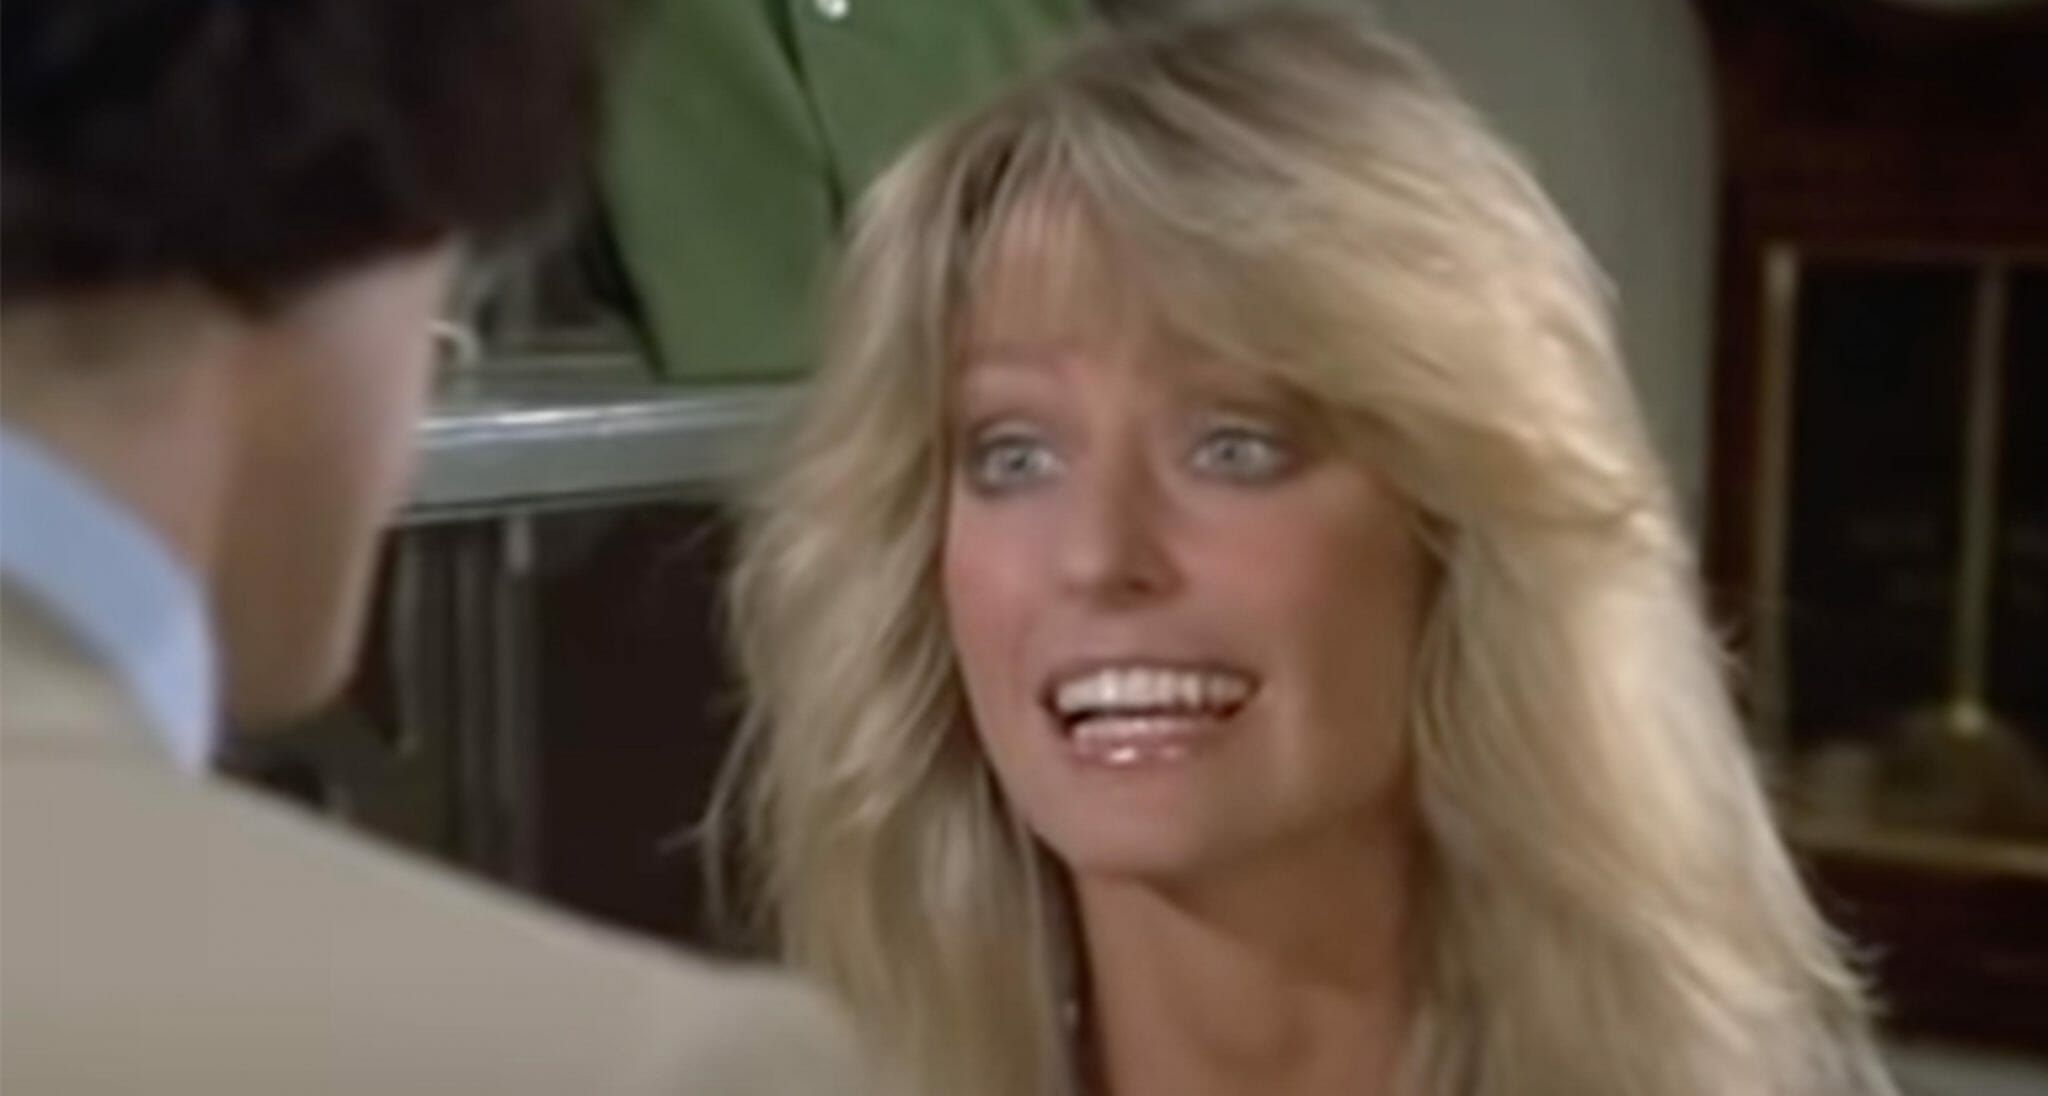 Here is an in-depth look at the life and career of the iconic actress Farrah Fawcett:Early Life: Farrah Fawcett was born on February 2, 1947, in Corpus Christi, Texas, as the second daughter of Pauline and Jim. Her mother was a homemaker, while her father worked as an oil field contractor.
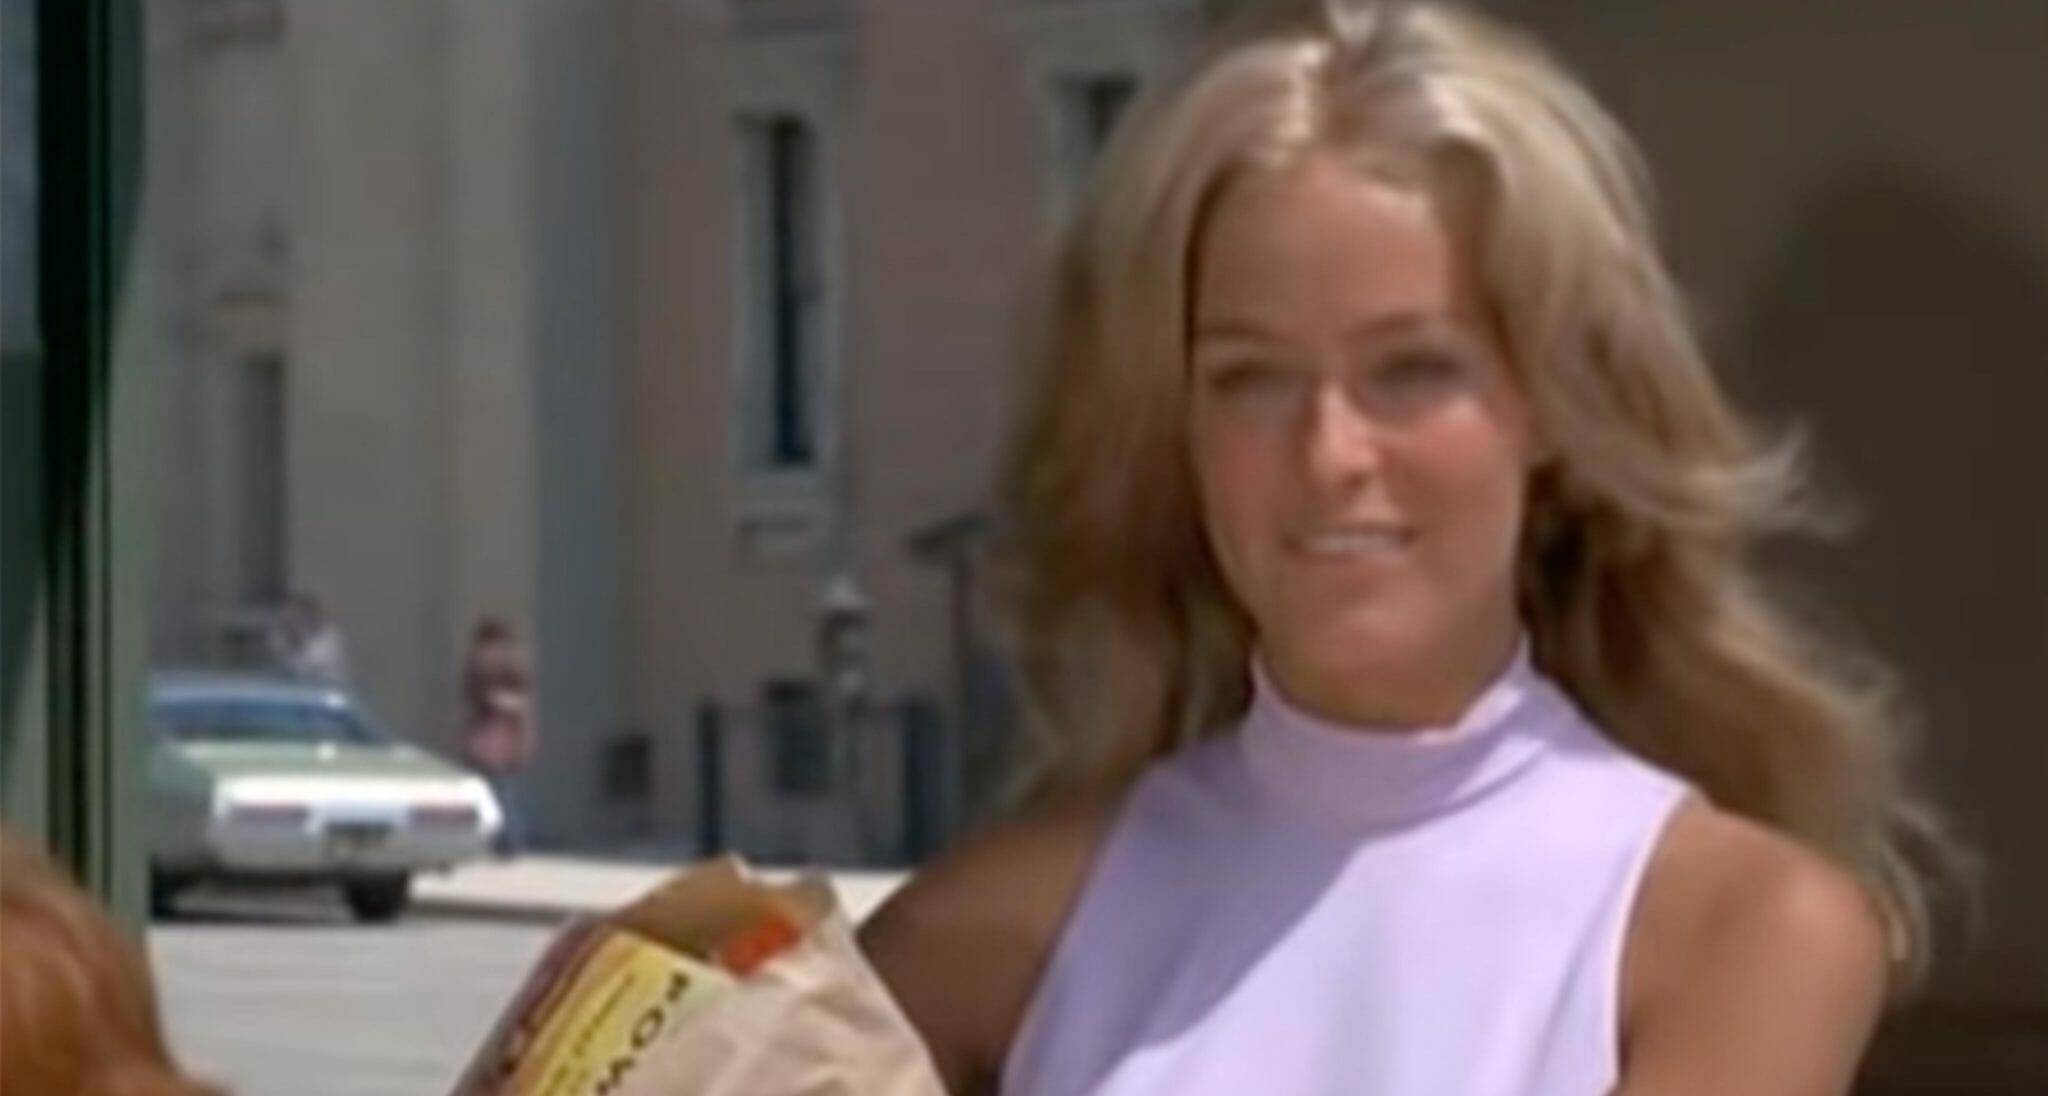 In her early life, Farrah was originally named Ferrah, derived from the Arabic word for “joy,” but she later chose to change her name.She quickly gained recognition for her striking beauty, even as a child, with people often remarking on her angelic appearance. However, the constant attention she received due to her looks made her feel self-conscious.
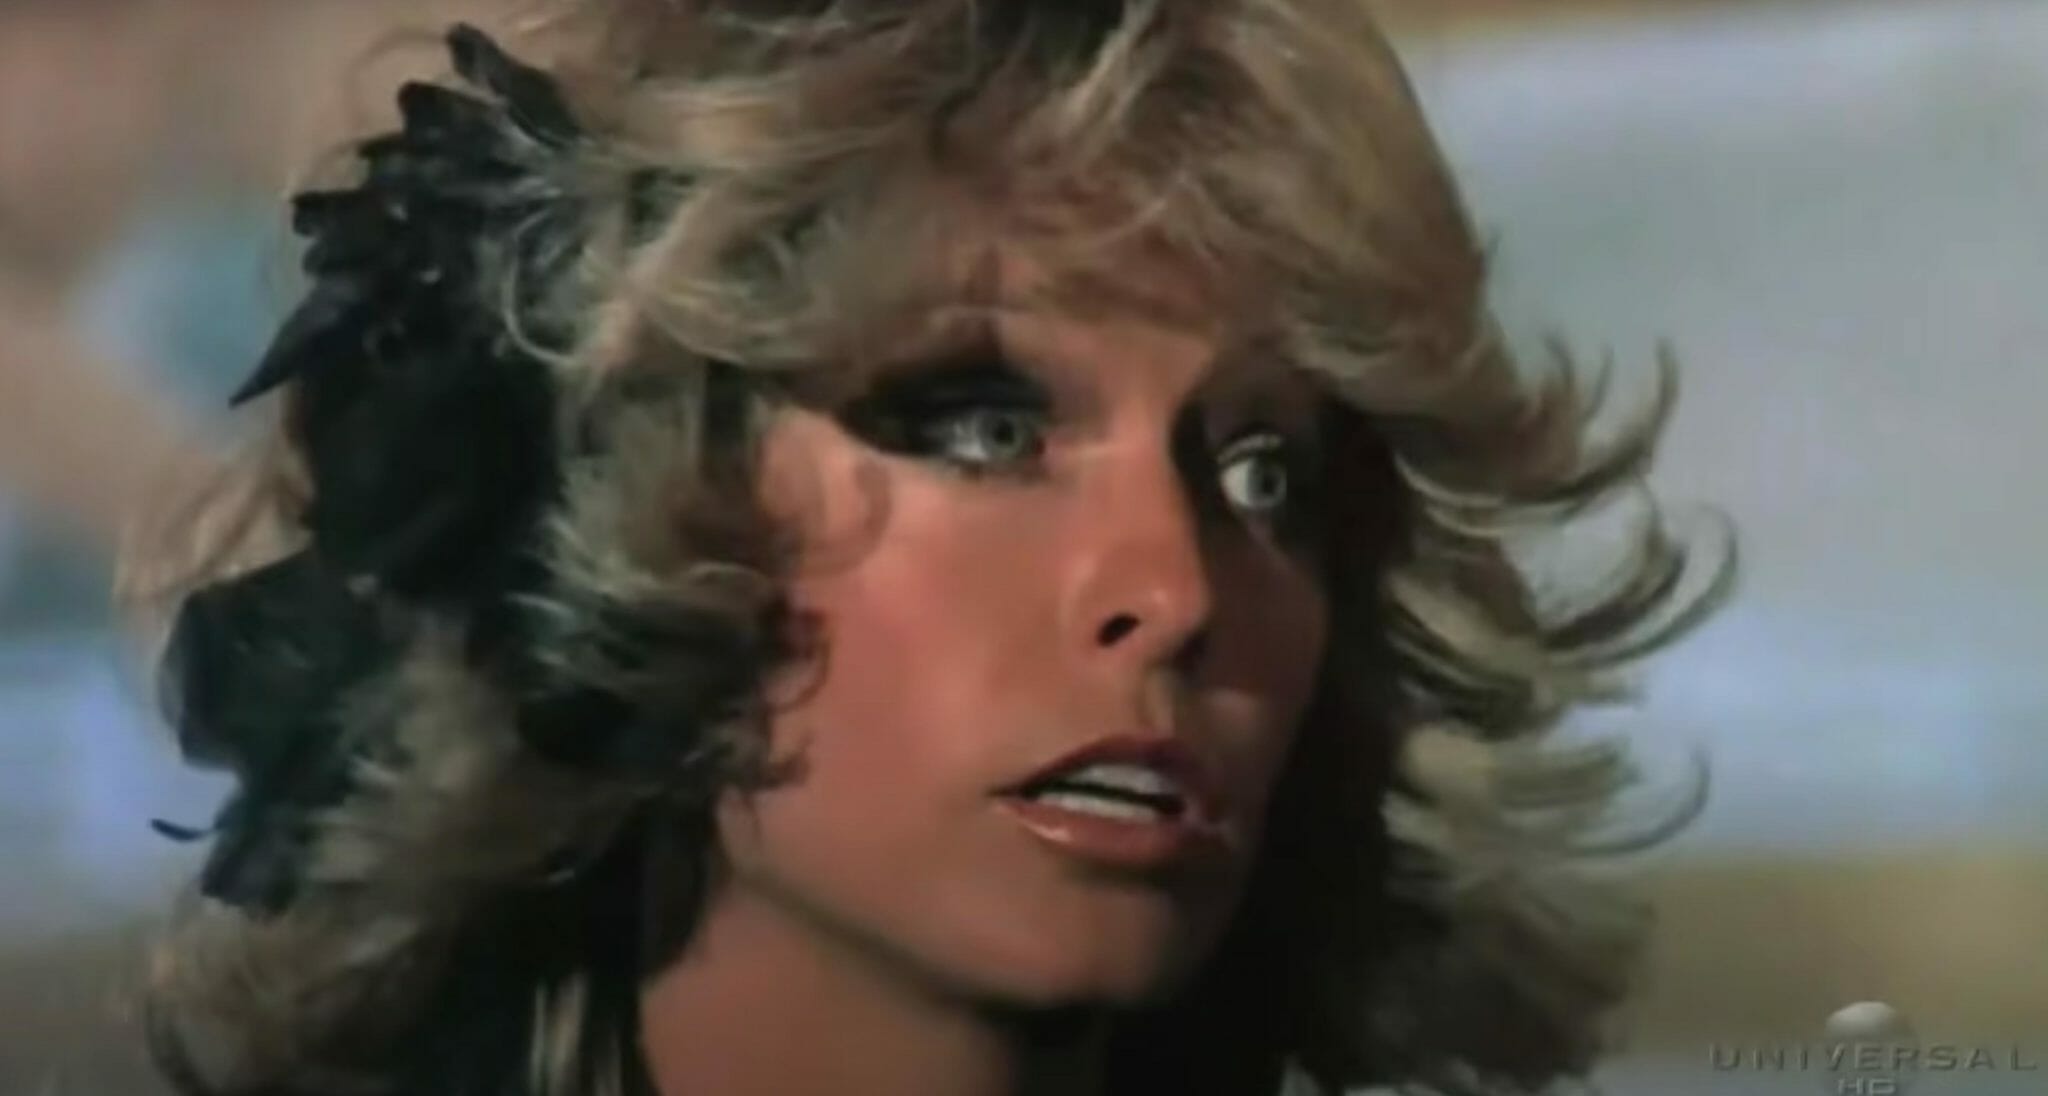 Education and Career: Farrah’s remarkable beauty followed her into high school, where she was voted “Most Beautiful” by her classmates for three consecutive years. She then attended the University of Texas, where she studied microbiology and art.In a twist of fate, her path toward modeling and acting began when a Hollywood PR man named David Mirisch saw a picture of her, which led him to contact her and persuade her to move to Los Angeles.
 Despite initially planning to return to the university for her senior year, Farrah ultimately decided to stay in Los Angeles and embarked on a modeling career.Charlie’s Angels and Iconic Poster: Farrah Fawcett’s rise to global stardom was catalyzed by her role in the television movie “Murder on Flight 502” (1975), which garnered the attention of famed TV producer Aaron Spelling. He cast her in a new show called “Charlie’s Angels” in 1976, where she played the role of Jill Munroe.
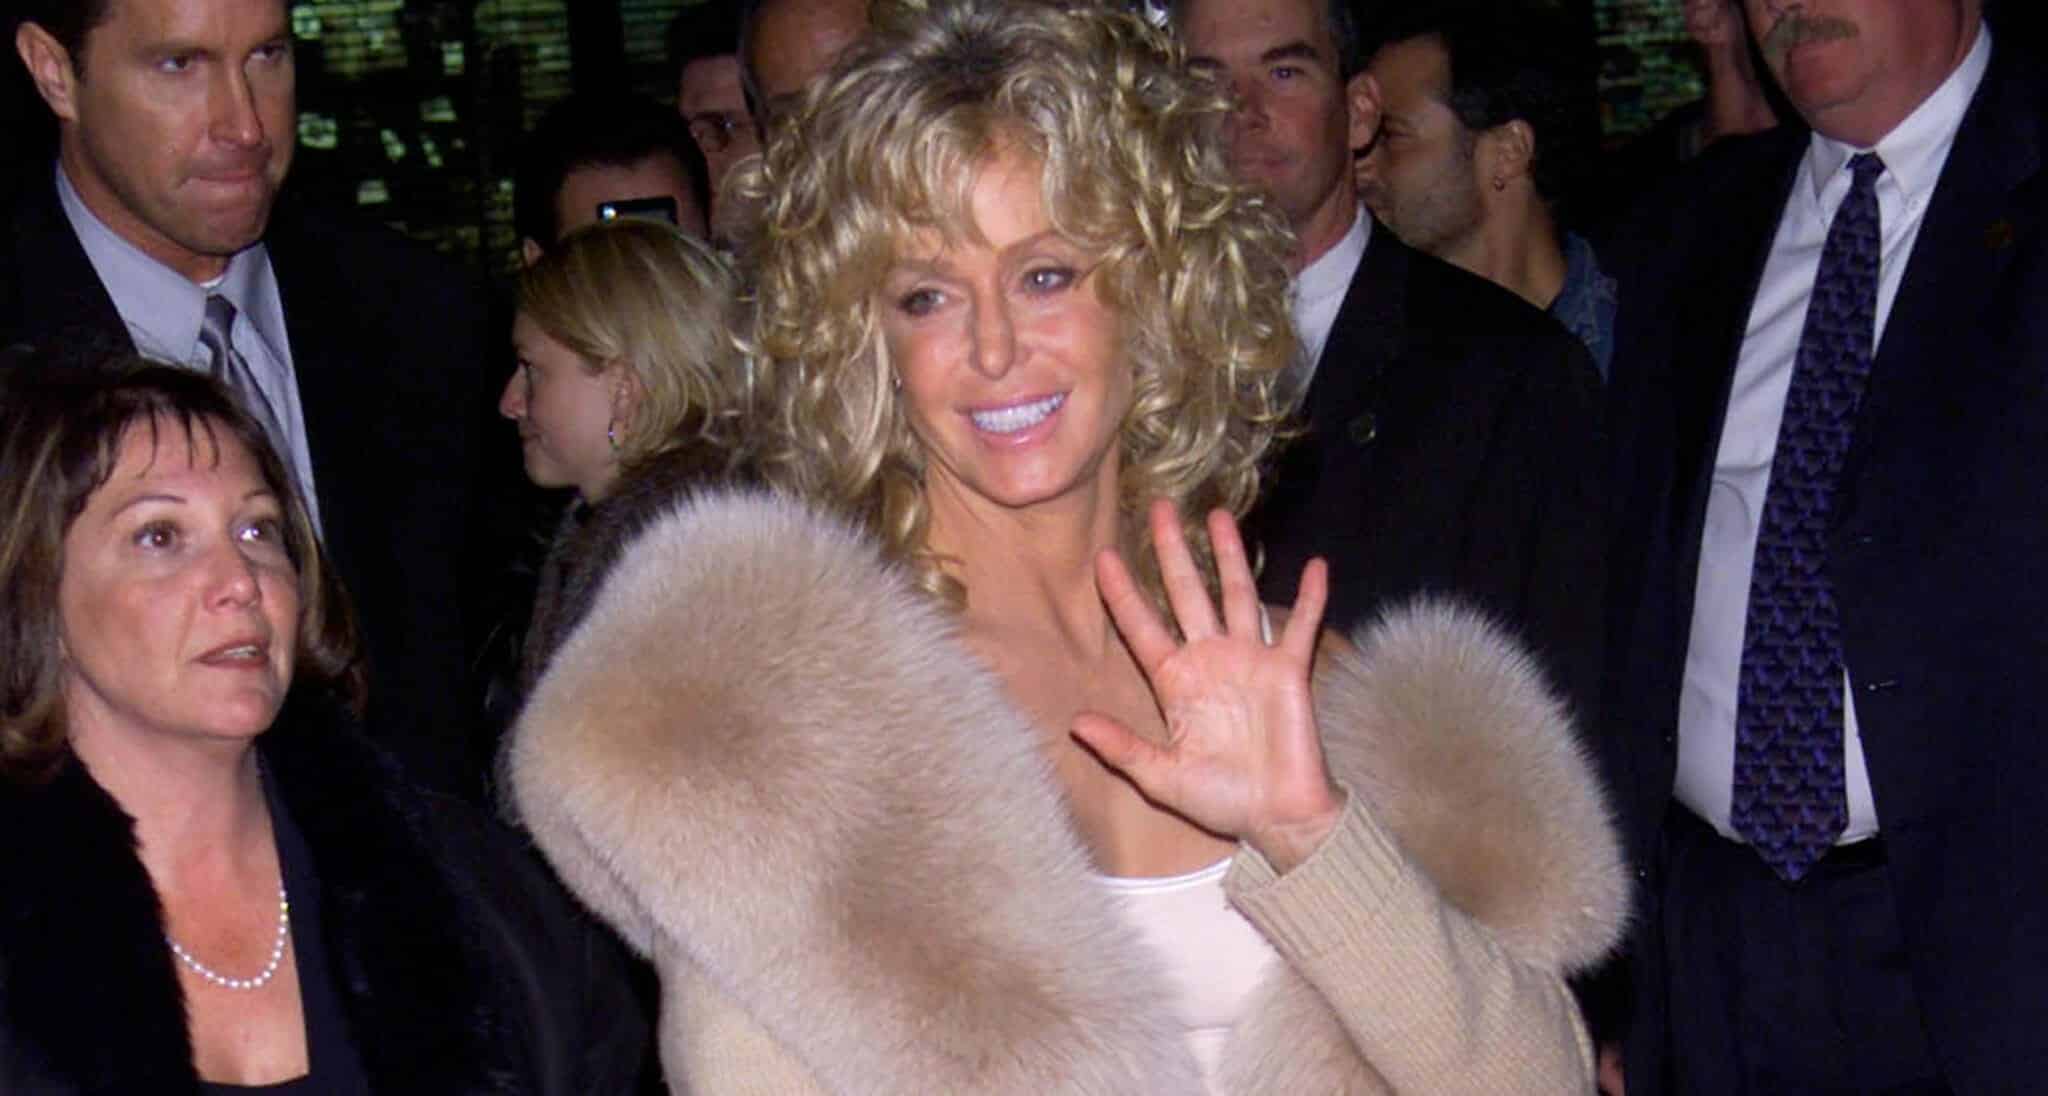 Farrah’s distinctive hairstyle became synonymous with the show and contributed significantly to its success. Her feathered, high-lighted, layered hair became a global phenomenon and is still remembered as one of the most iconic hairstyles of the 1970s.Additionally, in 1976, Farrah graced a poster wearing a red one-piece bathing suit. This poster became one of the best-selling posters of all time, further elevating her status as a global star.
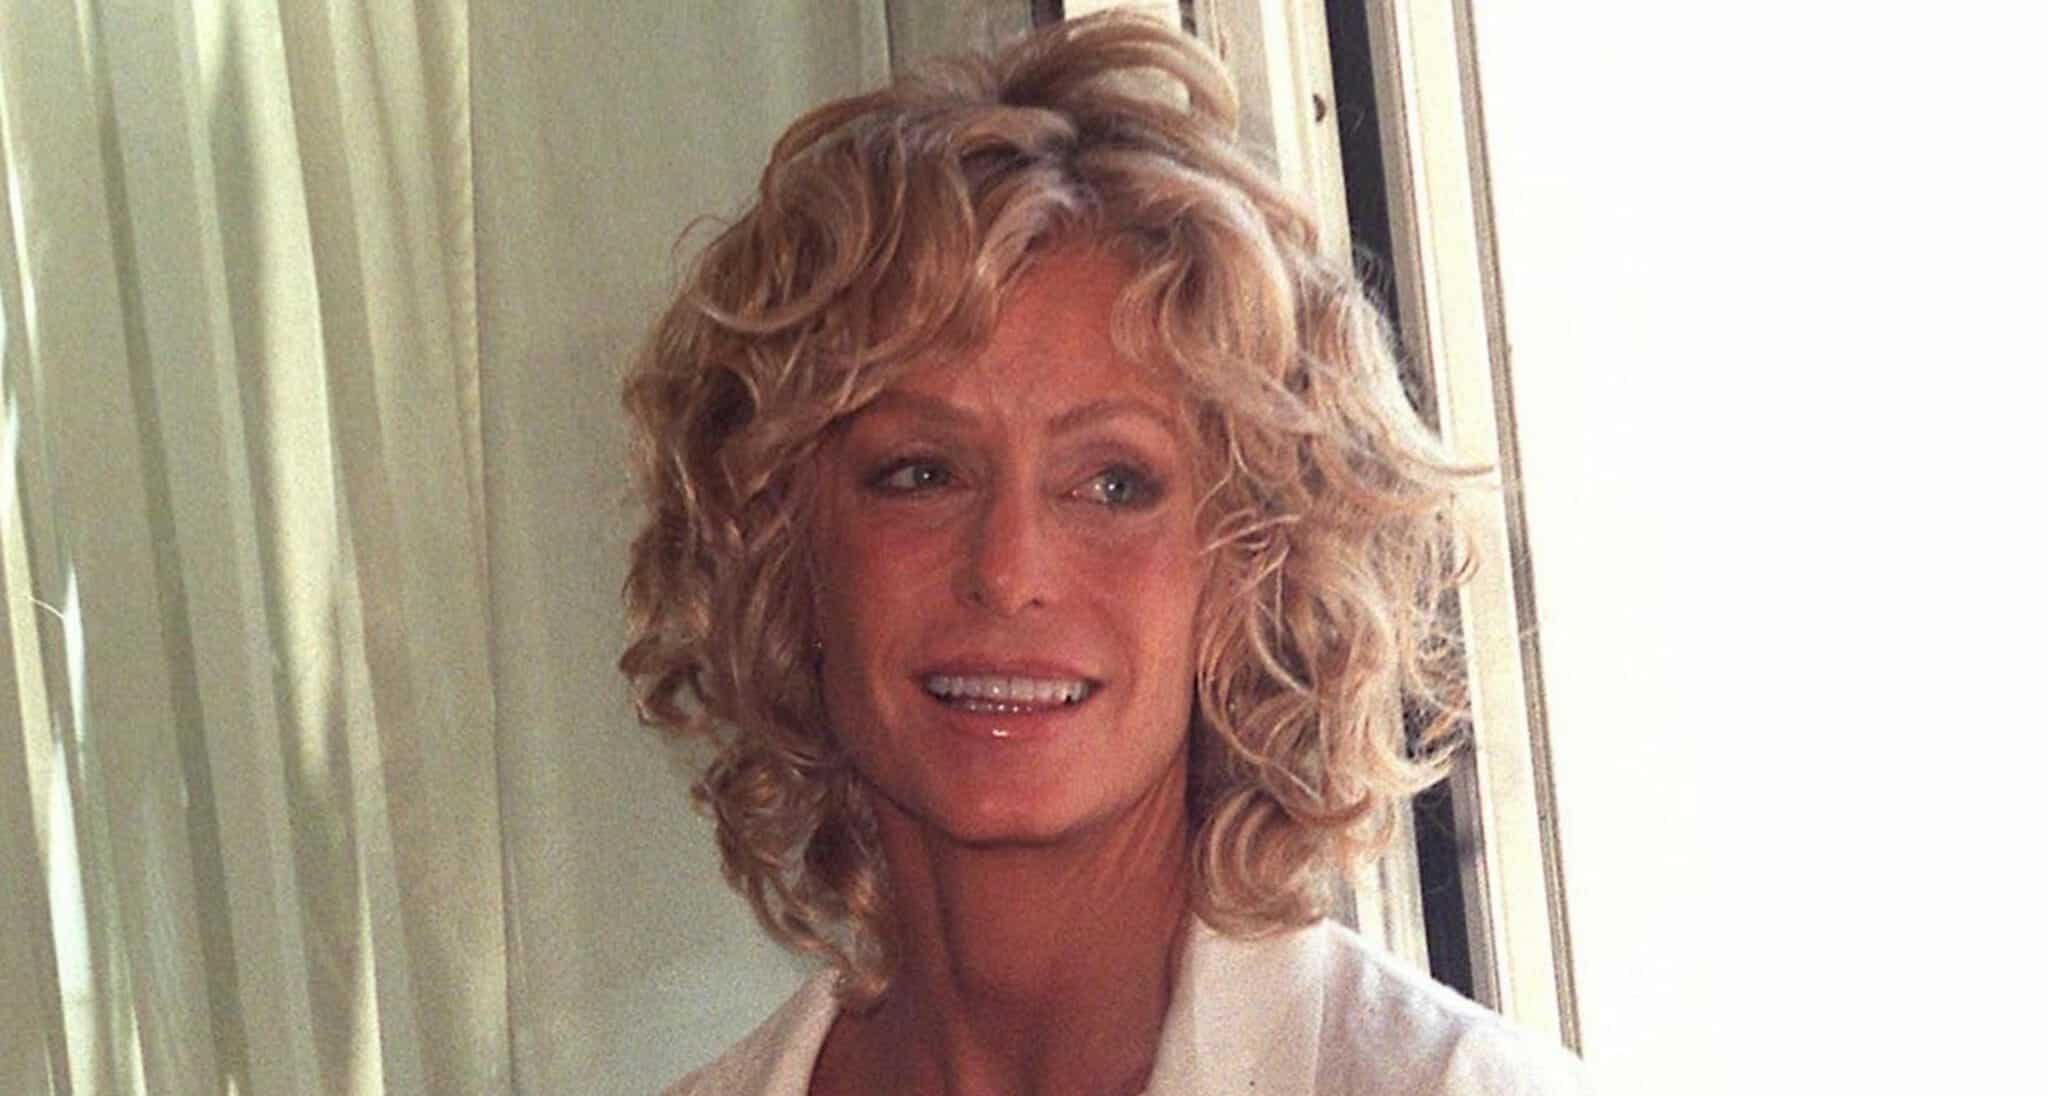 Challenges and Leaving Charlie’s Angels: Despite her skyrocketing fame, Farrah Fawcett encountered challenges during her time on Charlie’s Angels. She found the demanding production schedule and the quality of the scripts unsatisfactory, leading her to declare her contract invalid and leave the show.This decision resulted in a $7 million lawsuit against her for breach of contract, though a settlement was eventually reached. She returned to the show for six more episodes but appeared in only 29 out of 115 episodes.
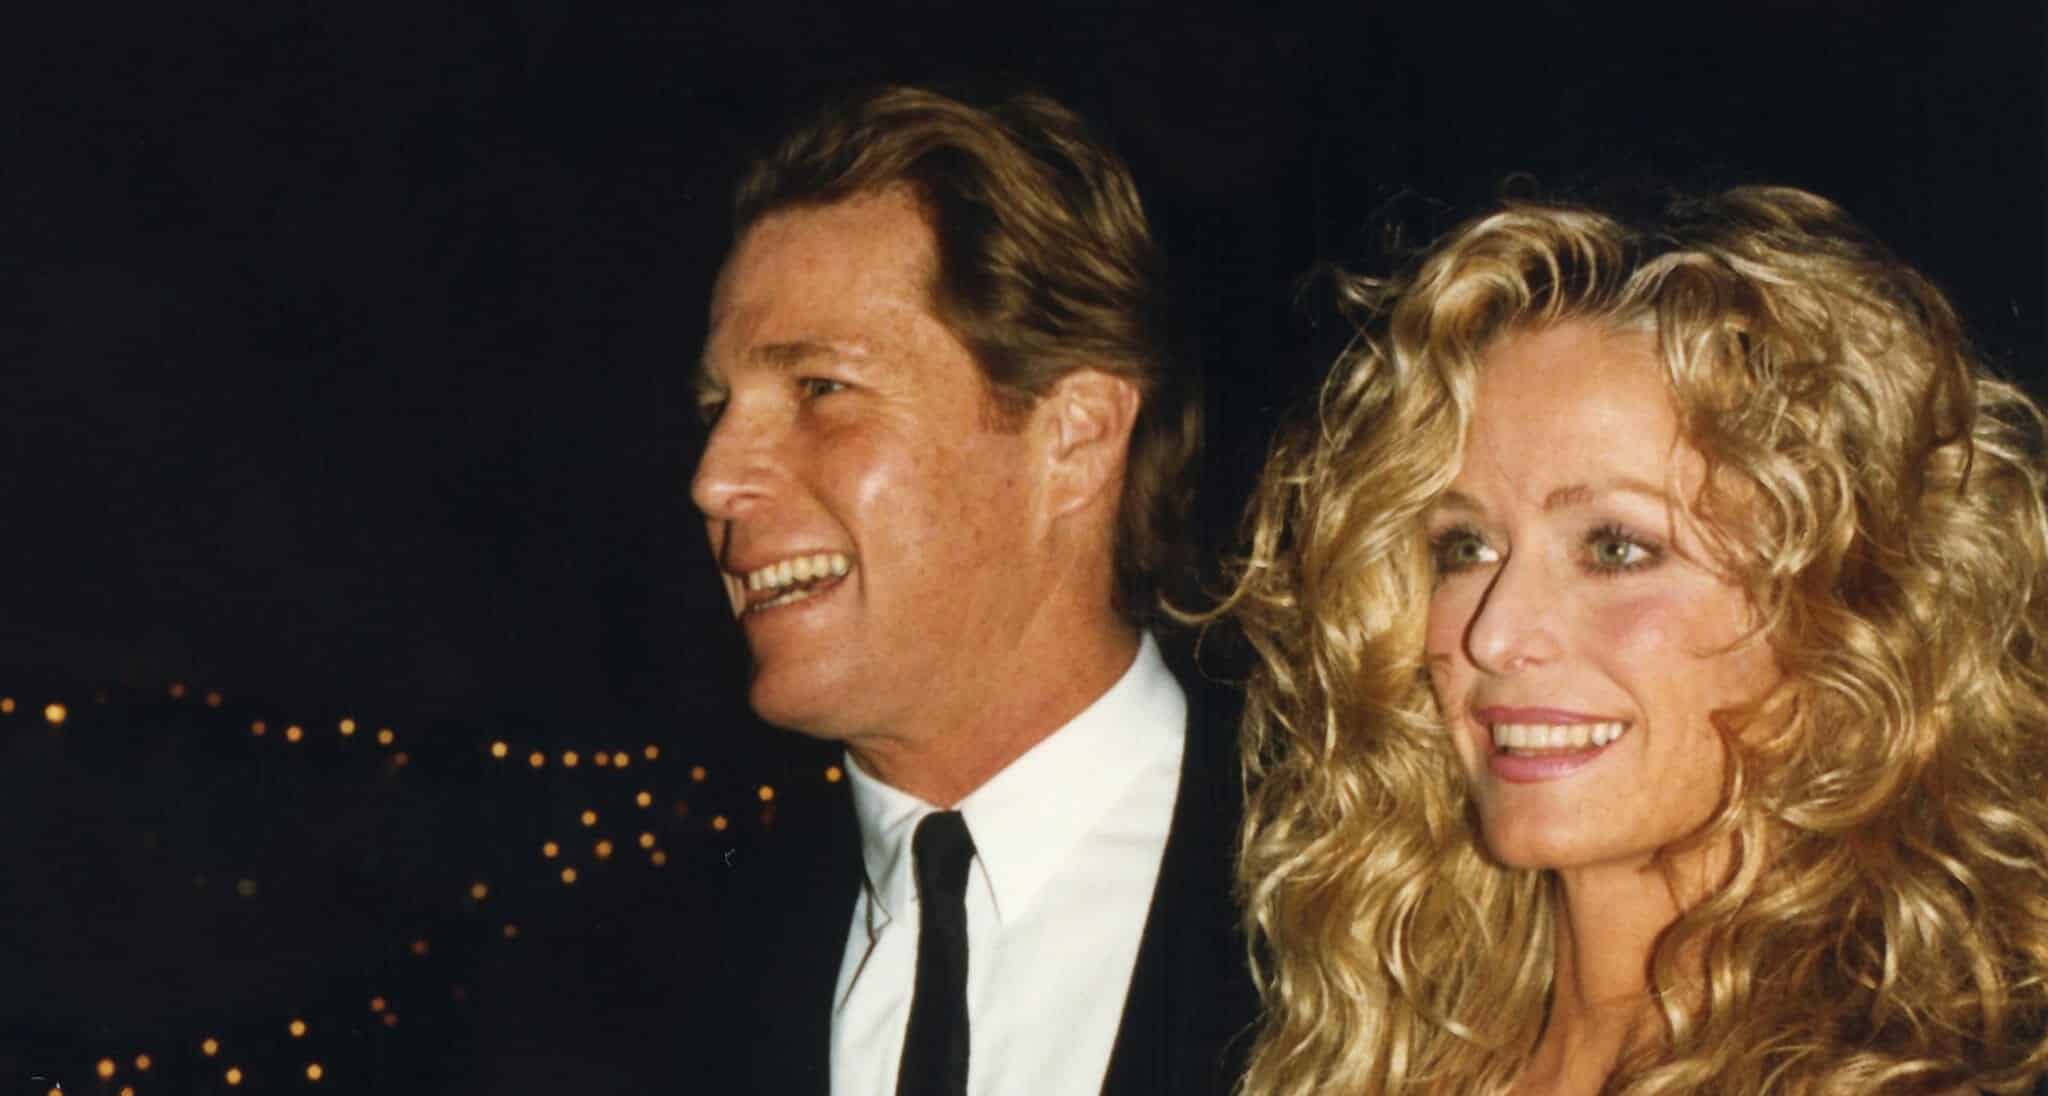 Private Life and Relationships: Farrah Fawcett’s personal life was marked by a rocky marriage to Lee Majors from 1973 to 1982. She also had high-profile relationships, including one with Canadian filmmaker James Orr.However, her most famous and enduring relationship was with actor Ryan O’Neal. O’Neal first saw Fawcett in 1979 and quickly became part of her inner circle, witnessing the breakdown of her marriage to Lee Majors.
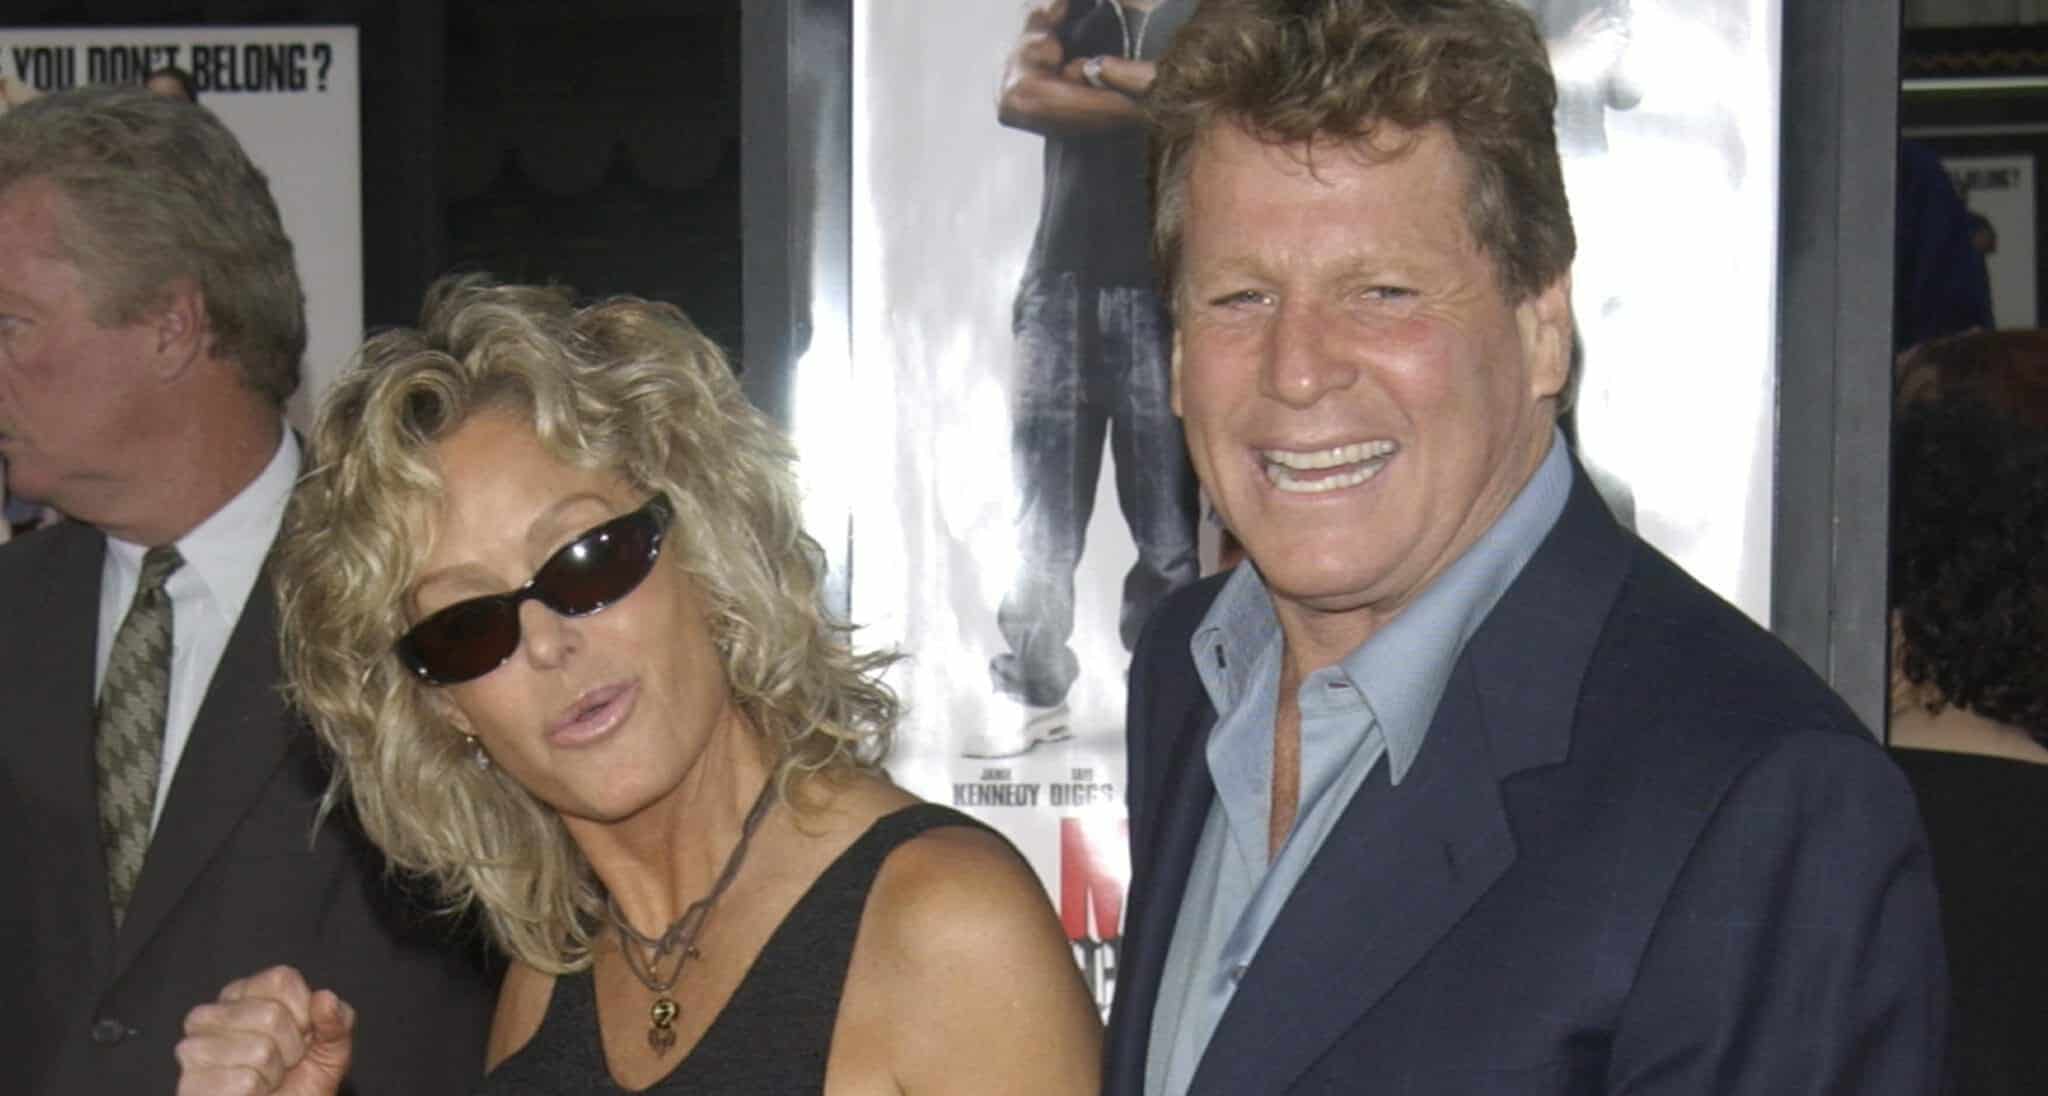 Their relationship was marked by its public nature, and they openly expressed their affection for each other. They even reunited after a brief split in 1998 when O’Neal was diagnosed with leukemia.Tragedy and Passing: In 2009, Farrah Fawcett tragically passed away at the age of 62. Her son, Redmond, lost his mother, and Ryan O’Neal lost his soulmate. At the time of her death, Farrah was estimated to have a net worth of around $20 million.
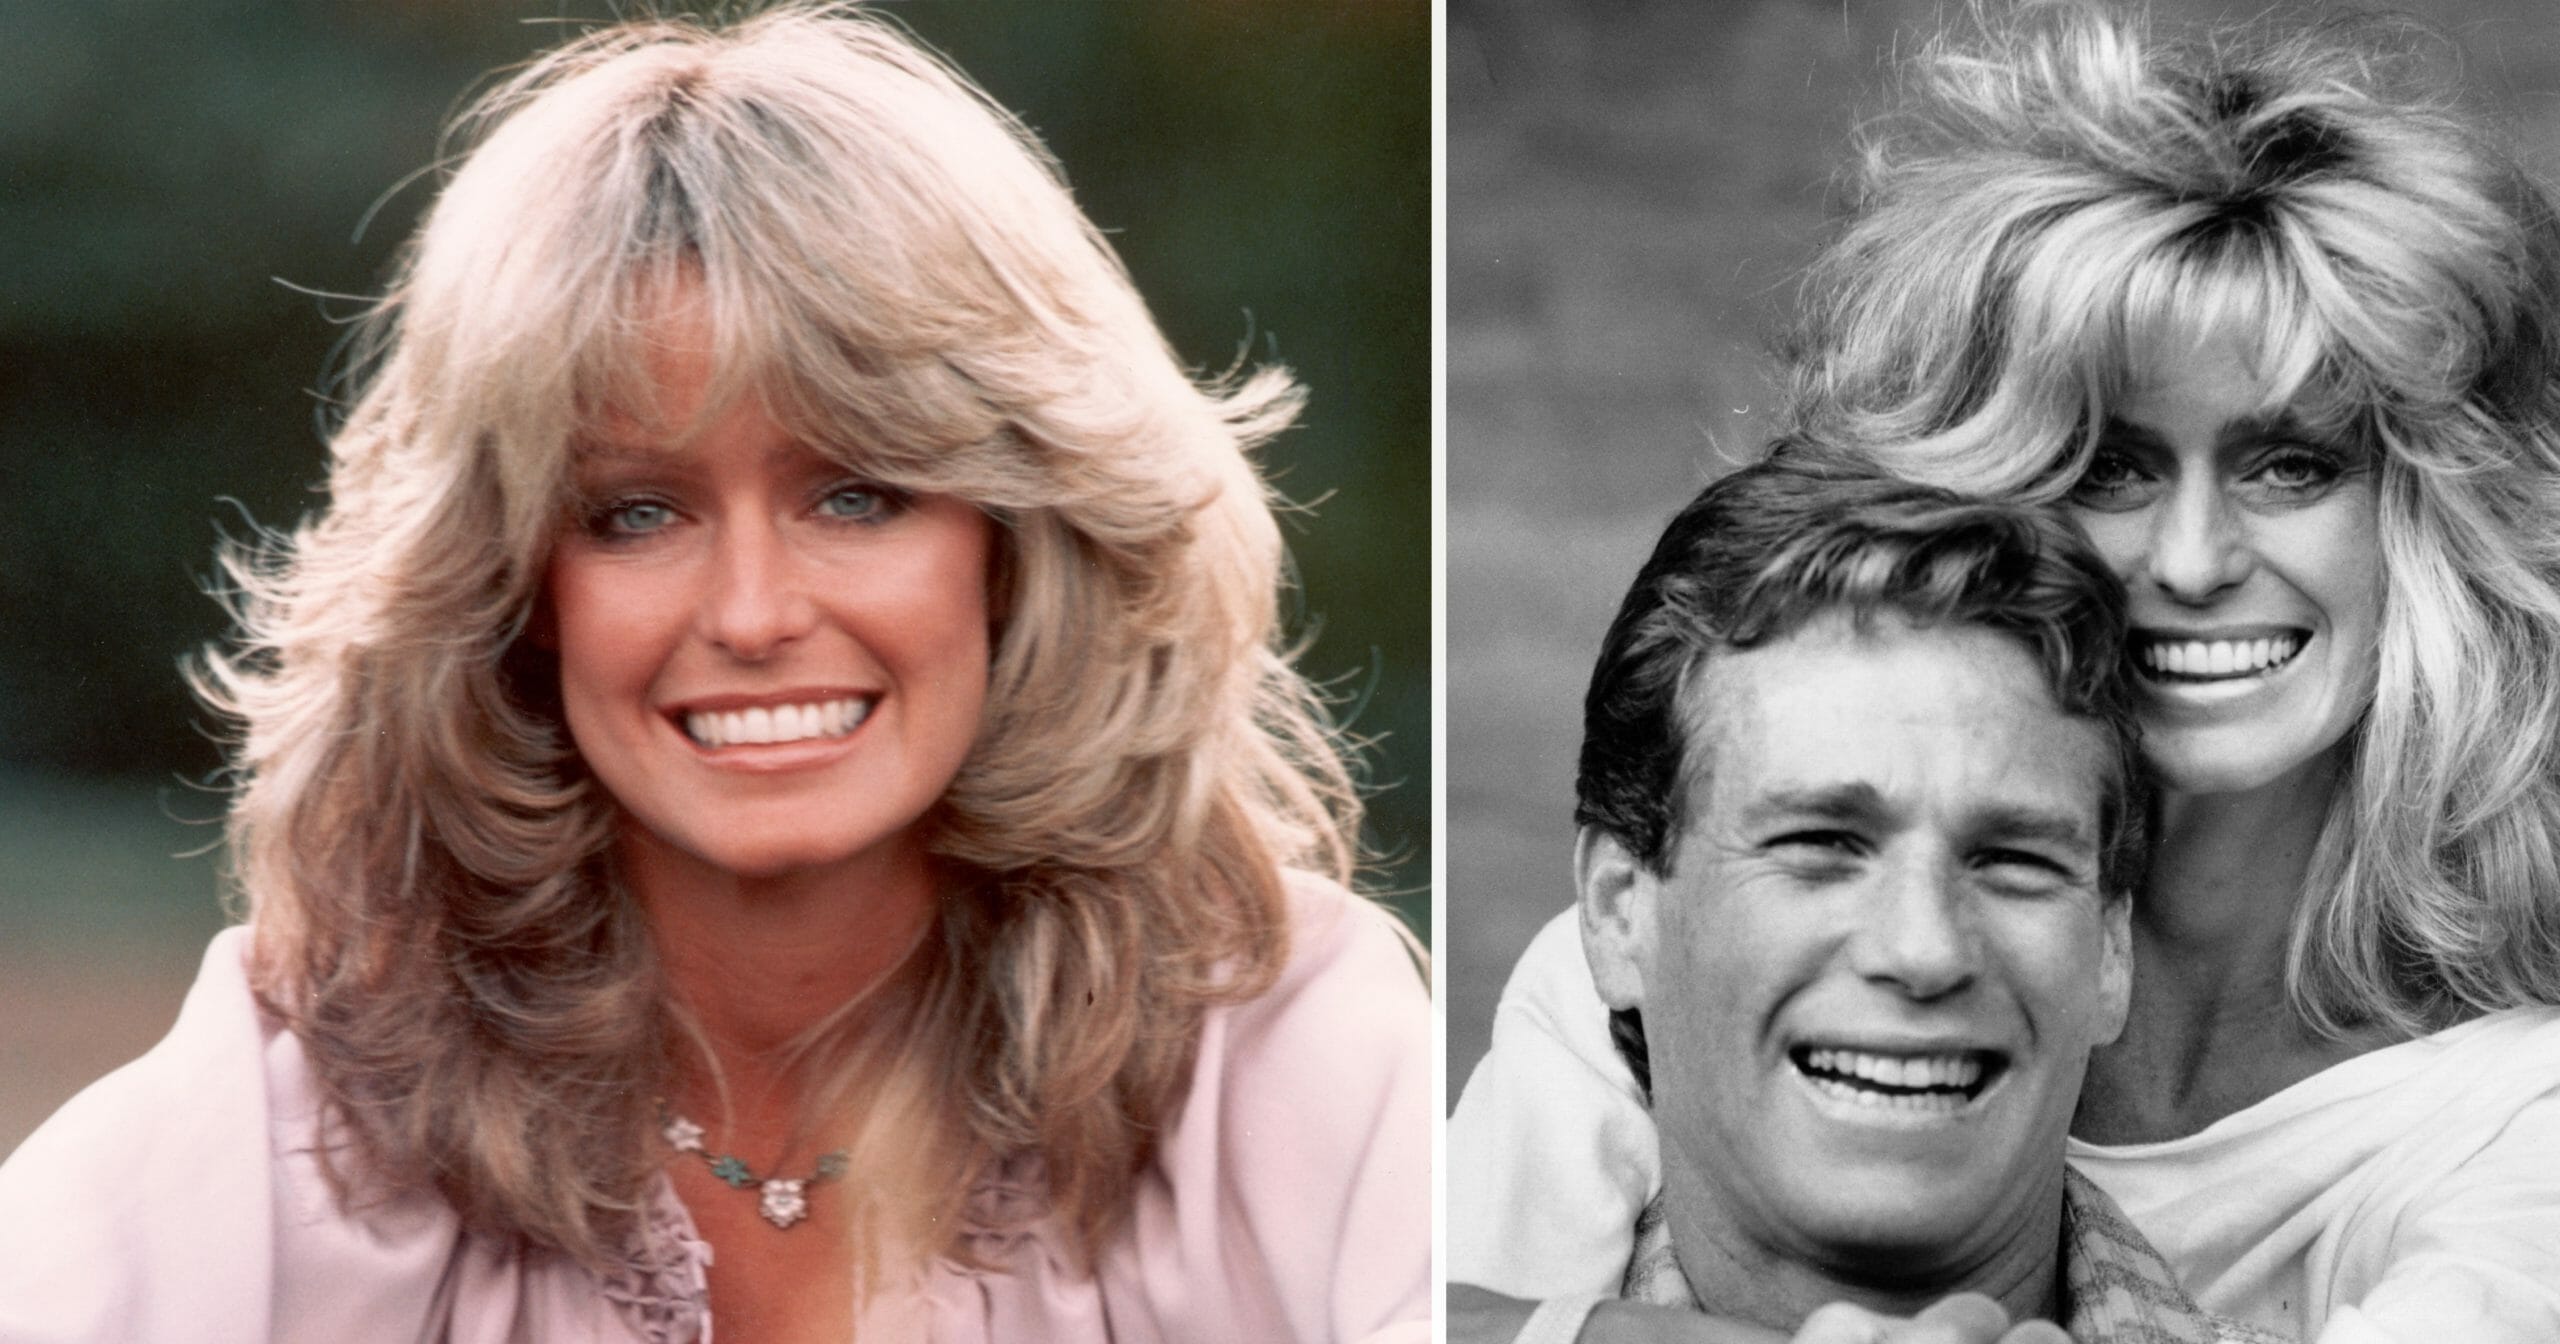 Ryan O’Neal described the poignant moment of her passing in his book, revealing that he held her in his arms as she slipped away.Farrah Fawcett’s legacy endures as a Hollywood legend known for her captivating performances on screen.Please feel free to share this article on Facebook with friends and family to pay tribute to her memory.