There are a lot of stories out there about kids who have grown up to look just like their celebrity parents.
From Michael J Fox’s twin daughters to Julia Roberts’s lookalike teen daughter and even Elvis Presley‘s grandson; there is a lot of celebrity offspring making us do a double-take when we look at them.
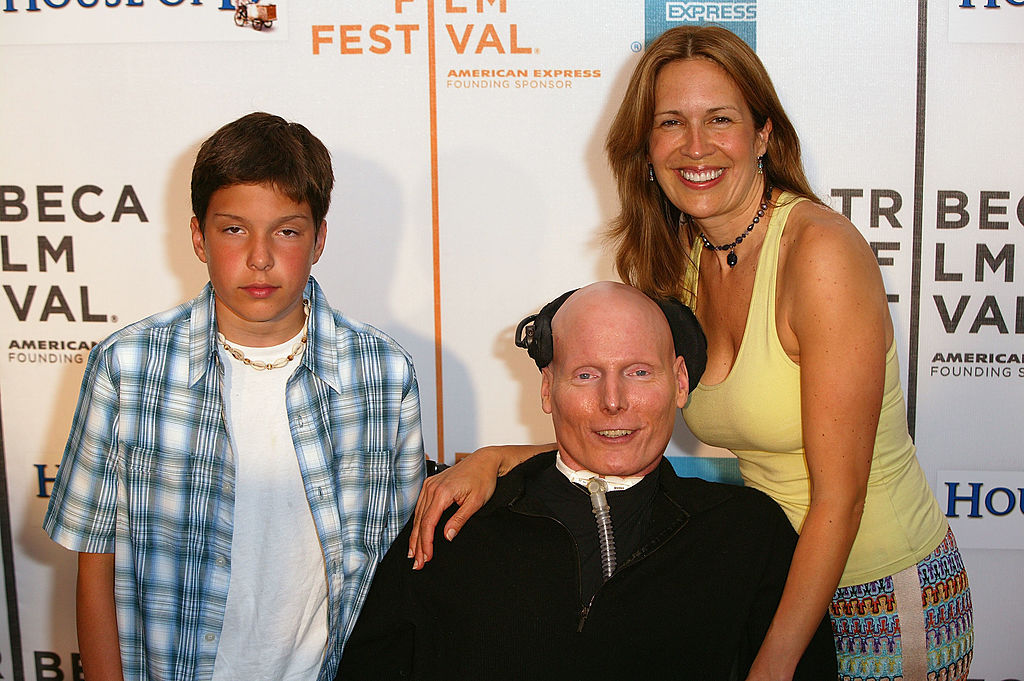
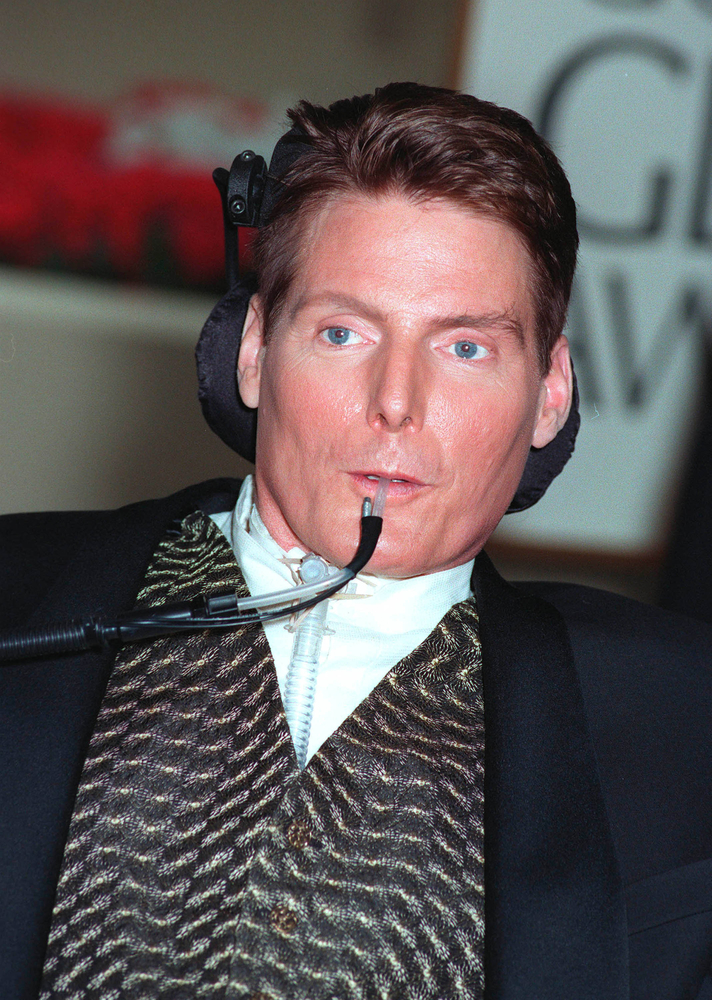
But, in the case of Christopher Reeve’s 29-year-old son Will he’s not only the spitting image of his father but is working hard to continue his father’s inspirational legacy.
Tragically, Christopher Reeve’s youngest son was forced to deal with the death of his parents when he was just 13.

What does a hero look like?
For millions of people growing up in the late 70s and early 80s, a hero looked like Christopher Reeve.
His portrayal of DC comic book hero Superman, which hit our screens in 1978, earned him a BAFTA award for Most Promising Male Newcomer.
The charismatic and handsome actor went on to star in three more superhero movies: Superman II, Superman III, and Superman IV: The Quest for Peace.
His name is synonymous with a famous superhero that we’ll never forget.
But Christopher Reeve, born in New York in 1952, wasn’t just an actor but a film director, producer, screenwriter, equestrian, and activist.
Christopher Reeve accident
On May 27, 1995, Christopher Reeve’s life would change forever.
During an equestrian competition in Culpeper, Virginia, the beloved actor fell off his horse Buck, and injured his spinal cord.
Millions of fans and his family were left in shock after the Hollywood actor became paralyzed from the neck down and confined to a wheelchair.
According to the actor’s foundation, Christopher’s mother begged the doctors to withdraw his mechanical ventilation and let him die.
New York Times would later reveal that if the actor had fallen one centimeter further to the left, he would have been killed instantly. On the other hand, if Christopher had landed slightly to the right, he would probably just suffered a concussion.
Christopher was only 42 years old when he became a quadriplegic. He was in a wheelchair and required a portable ventilator for the rest of his life.
Doctors quickly declared that there wasn’t much hope of improvement and they specifically told Reeve that it was going to be “impossible” for him to recover any movement.
Christopher Reeve was going through hell, and during the first days at the hospital, he was heavily medicated and delirious. After hearing the doctor’s devastating diagnosis, he felt that his life was ruined.

He didn’t want to be a burden to his family and told his wife, Dana Morosini, that they maybe should pull the plug.
She replied with tears in her eyes: ”I will support whatever you want to do because this is your life and your decision. But I want you to know that I’ll be with you for the long haul, no matter what. You’re still you. And I love you.”
Reeve could have given up, but instead, he focused on activism setting up the Christopher Reeve Foundation with his devoted wife Dana. It was later renamed the Christopher & Dana Reeve Foundation.
The couple also co-founded the Reeve-Irvine Research Center, lobbying on behalf of spinal cord injury victims and for stem cell research.
Christopher Reeve also decided to do whatever he could to grant his son a happy childhood.
During an interview with PEOPLE in 2016, Will opened up about his amazing childhood, which he considered a “totally normal” one.
“They were the people who told me to turn off the TV, to eat my broccoli, to go to bed,” Will lovingly recalled. “I understand that not every child experiences going to the grocery store and seeing their dad on the magazine at the checkout aisle, but … it was a totally normal childhood.”
Will also remembered when his father taught him how to ride a bike from his wheelchair. “I didn’t believe it was gonna work. I’m terrified, but I have my dad’s voice behind me going, ‘Steady, steady, left, right, left, right,’” he said, adding, “By the third lap, I’m smiling, looking at my dad, waving, and he’s smiling. That meant so much to him. Later on, I would race in a wheelchair. He’d let me win.”
Sadly, Will’s father passed away when they were piecing everything back together.
Christopher Reeve death
Christopher Reeve struggled with several health problems already as a young kid. He had asthma and allergies that affected his breathing.
At the age of 16, he also noticed that he suffered from alopecia areata, which caused his hair to fall out. Christopher was able to control the disease during his acting career, but when he became paralyzed, he chose to shave off all his hair.
In the early 2000s, Christopher was treated for several infections. In October 2004, he was being treated for an infected pressure ulcer that was causing sepsis. On October 9, he was watching his son Will’s hockey game, but that same night Christopher suffered a heart attack after being treated with antibiotics due to his infection.
He fell into a coma, and now there was nothing the doctors could do.
Christopher Reeve died on October 10, 2004, at age 52.
Both Mrs. Dana and the doctors said it was an adverse reaction to a drug that caused Reeve’s death.
His body was cremated at Ferncliff Cemetery in Hartsdale, New York, and his ashes were scattered.
Wife’s death
Just 10 months after his death, Christopher’s wife and caregiver Dana also was diagnosed with lung cancer, despite never smoking. However, according to Christopher P Andersen, Dana used to perform and sing in smoky bars and hotel lobbies during the early days of her career.

Dana, who was an American actress and singer, married actor Christopher Reeve in Williamstown, Massachusetts, on April 11, 1992.
After battling her malignant lung tumor for several months, Dana died on March 6, 2006, at the age of 44.
Will Reeve
Christopher and Dana’s son, William Elliot “Will” Reeve, was born on June 7, 1992. Sadly, Will was just 13 years old when he was left an orphan.
But today, Will has grown up to look just like his father – but until now has kept largely out of the spotlight.
Will has finished his education and has a blossoming career in the sports news industry.
Over a decade later, Will is now 29 years old, and has clearly inherited his father’s good looks; the resemblance is uncanny.
But that isn’t the most remarkable thing about this young man but the fact that he is continuing the good work his parents started.
Will could have gone downhill or off the rails after suffering such trauma at such a young age but thanks to his parents’ strong guidance and his own strength of character he did not allow himself to descend into darkness.
“There’s something my father used to say and which I use frequently today to not only honor his legacy but to imbue a new generation with his timeless spirit: ‘A hero is an ordinary individual who finds the strength to persevere and endure in spite of overwhelming obstacles,’” he said in a Daily Mail article.
Will and his dad also shared a love of sports and today is a contributor to ESPN’s SportsCenter, a job he promised his parents he would achieve.
He got the job after interning at ‘Good Morning America’ and working there as a production assistant while attending Middlebury College.
He continues the work his parents started, looking to find new therapies and helping to lead the fundraising for more breakthroughs in technology for spinal injury patients through the foundation.
Speaking to CBS News in 2018, Will talked about a letter he had written to himself after his parents died.
“I’ve got good news and bad news. I’ll start with the bad, because you always need to know exactly what’s going on, no matter what. That won’t change, by the way. The bad news is that you’re at the lowest point of your life. You’re in a hospital room in New York City, and you’ve just said your final goodbye to Mom,” he wrote. “You’re 13. She’s 44. Lung cancer. Never smoked. Gone, just like Dad, who died a year-and-a-half ago, which at the time was the lowest you had been. Now you’re at a new bottom and you’re terrified and confused and just so sad. But! Here’s the good news: this is the low point. There’s nowhere to go but up, and that’s exactly where you’re headed.”
What an inspirational young man Will Reeve is.
Despite having to endure the loss of both of his parents at such a young age, he is honoring their memories with his attitude and achievements every day.
I know his parents would have been so proud of what this young man has already achieved. He is such an inspiration.


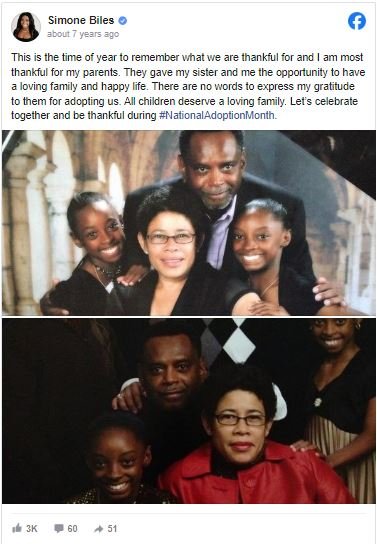
 for their unwavering sacrifices that have allowed me to fulfill my dreams. Above all, I would like to express my gratitude for your unwavering support at both my highs and lows. You people are the greatest of the best.I adore you all
  picture.@jb45RdZoY3 on Twitter
 via @NBCOlympics)