Deprecated: Function visual_composer is deprecated since version 5.8! Use wpbakery instead. in /home/dailygardeningmag/htdocs/dailygardeningmag.com/wp-includes/functions.php on line 6121 admin, Author at Daily Gardening Mag - Page 131 of 257
Fifteen years after his split from Katie Holmes, Tom Cruise, 61, has reportedly found love again with Elsina Khayrova, a 36-year-old Russian socialite.
This marks a significant new chapter in Cruise’s personal life, as he has remained largely single since his divorce.
Cruise and Khayrova’s relationship became public after they were spotted closely together at a London event last year, sparking rumors that have now culminated in confirmation of their romance.
Khayrova, who also holds British citizenship and is a former model, recently divorced Russian business tycoon Dmitry Tsvetkov.
She is known for her luxurious lifestyle and taste for the finer things, a trait acknowledged by her ex-husband in his well-wishes for her new relationship with Cruise. The couple has been cautious about their privacy, avoiding public photographs and maintaining discretion about their personal affairs.
Mara Wilson had her doubts about being a child star.
The “Mrs. Doubtfire” breakout actress, who went on to cement her status as a ’90s icon in “Matilda” and “Miracle on 34th Street,” opened up about the “sexualized” pressures of growing up in the spotlight.
“I don’t think you can be a child star without there being some kind of lasting damage,” Wilson told The Guardian while promoting memoir “Good Girls Don’t,” adding, “People don’t realize how much constantly talking to the press as a child weighs on you.”
Wilson began her career at age six. By seven years old, Wilson’s fame “kind of snowballed” and she began being asked by journalists if she knew what French kissing was or could pick out which fellow actor she found “sexiest.”
“I had people sending me inappropriate letters and posting things about me online,” Wilson continued, citing that her photograph was posted on pornography websites superimposed onto adult women’s bodies. “I made the mistake of Googling myself when I was 12 and saw things that I couldn’t unsee.”
She added, “The thing that people assume is that Hollywood is inherently corrupt, and there’s something about being on film sets that destroys you. For me, that was not necessarily true. I always felt safe on film sets. There were definitely some sketchy, questionable things that happened at times – adults that told dirty jokes, or sexually harassed people in front of me. People who did things like ask me if it was OK if I worked overtime, instead of asking my parents, but I never felt unsafe. I think that’s because I worked with a lot of really wonderful directors, who were used to working with children.”
It was when Wilson hit puberty that Hollywood seemed to turn on her. By age 12, Wilson was asked by a director to wear a sports bra to hide her developing breasts; Wilson believed she was no longer “cute” and that the film industry was “kind of done” with her.
“It affected me for a very long time because I had this Hollywood idea that if you’re not cute any more, if you’re not beautiful, then you are worthless. Because I directly tied that to the demise of my career,” Wilson said. “Even though I was sort of burned out on it, and Hollywood was burned out on me, it still doesn’t feel good to be rejected. For a long time, I had this kind of dysmorphia about the way that I looked and I obsessed about it too much.”
One of Wilson’s final auditions led to Kristen Stewart being cast in a role, only fueling Wilson’s self-doubt further.
“You think, ‘I’m ugly, I’m fat’ – and there were actual websites and newspapers and movie reviewers saying that about me,” Wilson recalled. “It got to the point where I became much more guarded, more anxious and depressed and cynical, and when you’re like that, it’s very hard to land a role, because in an audition, you have to be open and honest. It took a toll on me.”
Wilson previously opened up about being fetishized by fans and admitting that she “felt sick” and “furious” seeing current child stars like “Stranger Things” actress Millie Bobby Brown endure similar abuse online.
“What’s really at play here is the creepy, inappropriate public inclination to sexualize young girls in the media,” Wilson wrote in 2017, when Brown was 13 years old. “I am not a child anymore. Millie Bobby Brown is. Commenting on a child’s body, whether in a ‘positive’ or ‘negative’ way, in a sexualizing or pitying way, is still commenting on a child’s body.”
Susan Boyle captured the hearts of music lovers around the world when she first appeared on the third season of “Britain’s Got Talent” over a decade ago.
The video of her first audition when she stood in front of Simon Cowell, shy and unassuming and then blew everyone away with her rendition of “I Dreamed a Dream” from Les Misérables has been watched by millions.
She gained fame, as well as earned millions of dollars through album sales. However, her journey hasn’t all been sunshine and roses, and the singer’s love life has long been the subject of rumors and speculation.
So, did Susan Boyle ever marry? Does she have a partner? And where is she living now?
It’s quite natural to stop and look in the rearview mirror as you grow older – and Susan Boyle can certainly look back on a remarkable life.
In 2008, the unemployed charity worker lived alone with her cat, Pebbles, and wanted to see if she could make it in show business. After performing I Dreamed a Dream from Les Misérables in front of Simon Cowell and the rest of Britain’s Got Talent judges, the 47-year-old became a star overnight.
The crazy underdog audition gained her instant recognition across the world. Even today, her journey is inspiring to millions.
“I used to be a kind of spectator looking outward at the world. But now I’m part of that world and, though frightening, I’m going to embrace it,” Boyle said after her breakthrough.
In her first year as a superstar, she made $6.8 million.
Her success continued and after the release of her second studio album, she became the third artist to top the charts in the UK and the US twice in the same year.
Overnight this unassuming and shy then 47-year-old from Scotland became an international superstar and a millionaire.
Even though her career took her around the globe and made her a multi-millionaire, Susan Boyle has always remained honest, down-to-earth, and genuinely caring.
Unlike many other celebrities, she has never flashed her cash; the humble singer still lives in her childhood home in Blackburn, Scotland.
She purchased the modest house in 2010.
”It’s best to be grounded and with your roots. It keeps you grounded and prevents you from saying things maybe you shouldn’t say,” she told OK!.
Susan Boyle was born on April 1, 1961. Her parents – Patrick Boyle, a miner, WWII veteran, and singer, and Bridget, a shorthand typist – were both immigrants from County Donegal, Ireland. Boyle grew up as the youngest of four brothers and six sisters.
The family lived in a council house in West Lothian, Scotland. Still to this day, Susan lives in that house.
She could have done anything, gone anywhere, bought a mansion in Beverly Hills, but instead, she returned to her childhood home, a four-bedroom ex-council house in Blackburn, Scotland, bought it, and turned it into the home of her dreams.
In a tour of her newly decorated abode, which she’s called home for 60 years now, she reveals her stunning new piano room which is the first thing you see when you enter her home.
She joked about her piano room as she said she’d only just started having lessons.
“That’s a giggle for a start because I can’t even do scales,” she joked.
The newly renovated kitchen used to be small and sparse with a table in the center near the oven which she said made it hazardous, but the renovation gives her a lot more space and many updates. It even has a framed photo of Susan meeting Pope Francis.
Her living room is bright and homey and full of pictures of her family. Susan is the youngest child of 7 brothers and sisters so originally her house occupied 9 people. It must feel a lot roomier now.
As you move through the home, you see her career documented in various framed awards and accolades along with many cute animal ornaments, a testament to her gentle nature and down-to-earth personality.
Upstairs Susan shows us what used to be the room she once shared with her two sisters which then became hers after her sisters left home. She recalls the record player that used to sit in the corner and how she was a huge fan of The Osmonds.
Her father died in the 1990s by which time her brothers and sisters had all left home. Susan stayed at home and cared for her elderly mother until her death in 2007 so the household’s precious memories for the superstar.
“Some people seem surprised that I choose to stay in my family home. Why shouldn’t I? I feel Mum is still here and there are so many good memories … I’ve spent most of my life in this house and I won’t move now, because I feel it’s part of my new history,” she said.
Susan has always been open about the fact that she wants to meet the love of her life and find a long-term partner. That person will of course move into her house – because Susan is not leaving.
While SuBo is patiently waiting to meet ”Mr Right”, there is something else that has been bothering her for a while. Susan has always wanted to be a mother and have children of her own.
”I’ve never had any of my own, that’s my biggest regret, but I love kids. They’re good fun to be with,” she told The Sun.
As a 60-year-old woman, time is not exactly on her side. But Susan has opened up on perhaps adopting or becoming a foster parent for children who need a safe and loving home.
“I’ve a lovely house, why not share it?” she said.
Susan’s home reminds us all that despite her overnight stardom she’s still an everyday person who chooses to live the quiet life in the only home she’s ever known.
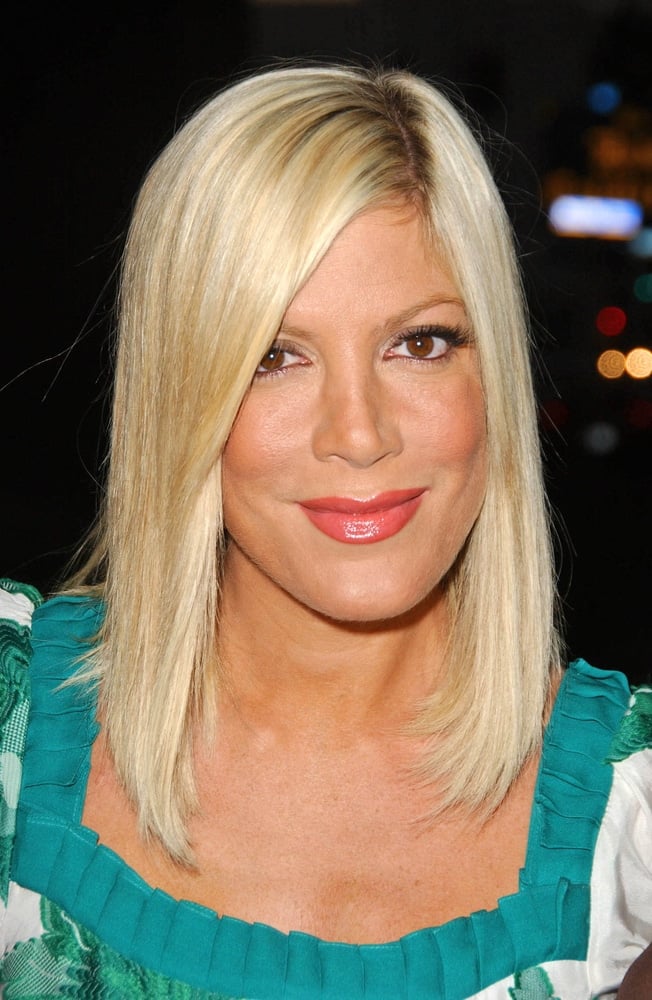
Tori Spelling is someone who has been familiar with media scrutiny for a long time. The actress and reality television star has had a tough time recently with her divorce and other unfortunate circumstances.
Tori Spelling has faced numerous challenges lately. This year, she and her husband, Dean McDermott, split up. The couple, who married in 2006, announced their separation earlier this year. McDermott took to Instagram to make a statement.
He wrote, “It’s with great sadness and a very very heavy heart that after 18 years together and 5 amazing children, that @torispelling and I have decided to go our separate ways, and start a new journey of our own,” and continued,
“We will continue to work together as loving parents and guide and love our children through this difficult time. We ask that you all respect our privacy as we take this time to surround our family with love and work our way through this.”
While he deleted the post soon after, tensions between the couple were said to have remained. After 17 years of marriage and 18 years together, the couple decided to part ways and co-parent amicably.
Following her split, the actress had to leave their rental home because of a mold infestation. Subsequently, the Scream 2 actress and her five children spent time in an RV.
After their stint in the RV, the family found another rental. However, they were forced to evacuate it earlier this week. In mid-October, Spelling and her five children—Liam, Stella, Hattie, Finn, and Beau—were forcefully evacuated from their rental home by a SWAT team. The officials were called in to deal with an armed gunman near their home, resulting in a SWAT standoff.
All this moving around has caused significant uncertainty in their lives. A source close to the family said, “She’s trying to find her footing and doing her best to take care of her kids.” They also mentioned that the actress had a recent hospital stay and had to deal with her separation and their housing situation.
“She’s not used to moving around for months and months on end. Being forced out of her rental was scary for her and her children,” the source added.
The source also shared how the children were affected. They said, “Her kids are at an age where they can kind of understand what’s going on,” adding, “Their friends from school do too and ask them about their current situation.”
If you found this interesting, check the piece below about Tori Spelling being forced to live in an RV with her five children.
Tori Spelling and Dean McDermott decided to call it quits after 17 years of marriage – this was the last straw. All in all, it seems like Tori Spelling and her children have had a hard time in recent days. We are sending them our best during these trying times. Share this with others so they can send Tori and her kids their well wishes too!
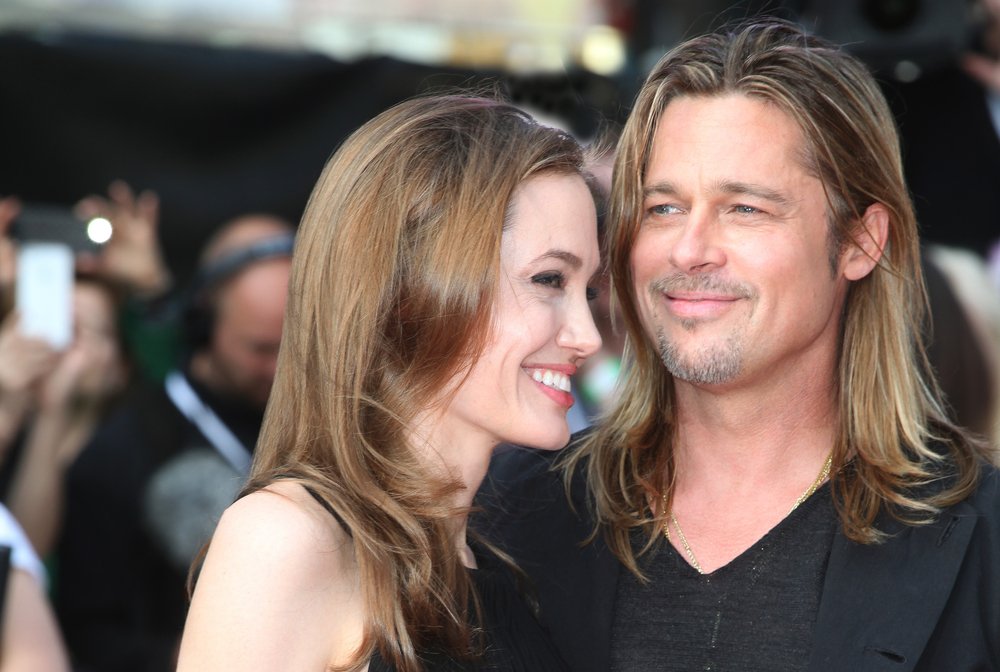
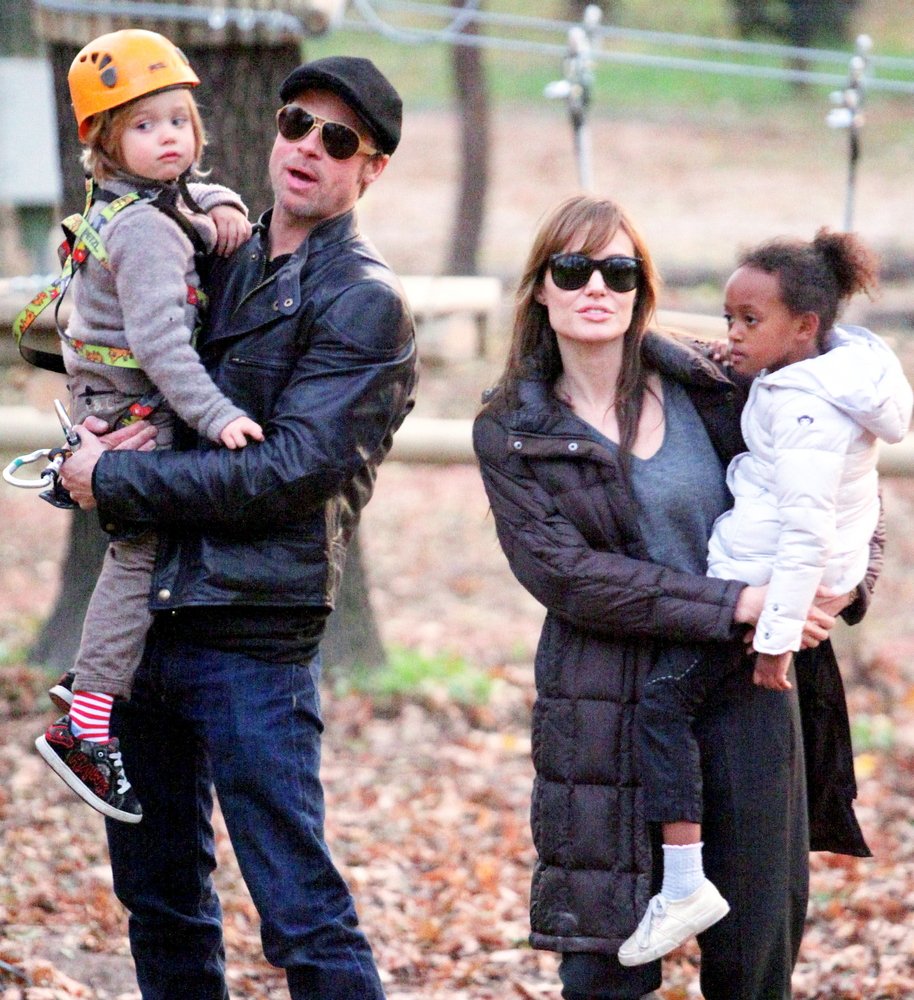
Once, Brad Pitt and Angelina Jolie were Hollywood’s hottest couple, shining brighter than anyone else. But their relationship fell apart, and now, any news about them usually focuses on their messy divorce and legal battles.
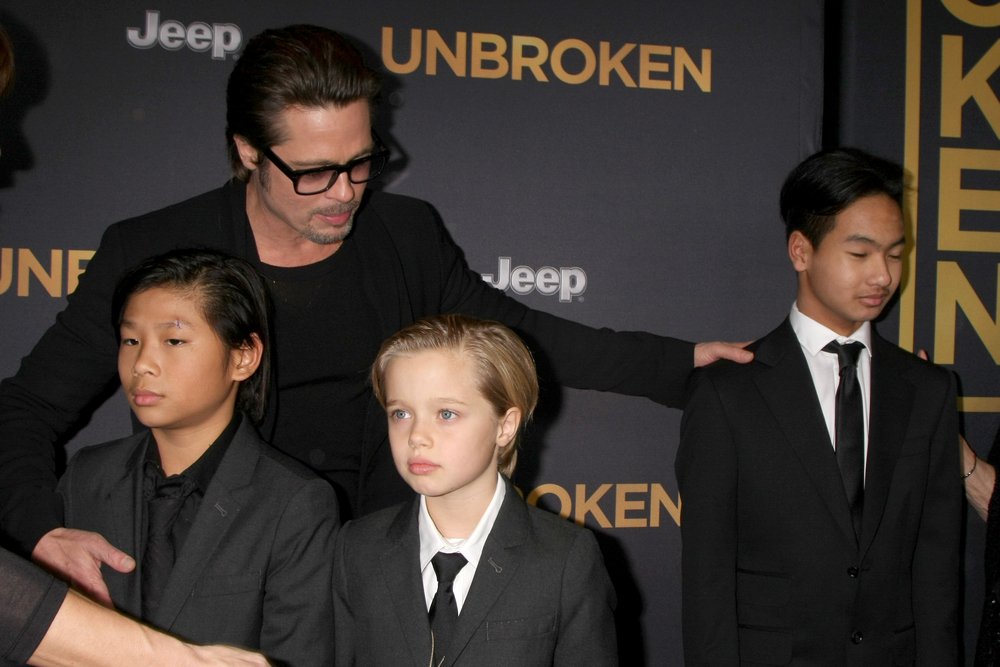
Recently, a new court filing revealed that Brad Pitt’s alleged physical abuse of Angelina Jolie started before the famous 2016 plane incident.The two stars have been fighting in court over a French winery they bought together. Their once strong bond is now broken and on display for everyone to see.In 2022, Pitt sued Jolie and her former company, Nouvel, for selling her half of the winery. Pitt claimed they had agreed not to sell their shares without the other’s approval, and said Jolie’s actions hurt the business he worked hard to build.Jolie responded by accusing Pitt of becoming abusive during a plane ride from France to California in 2016. She said he grabbed her by the head and was also physically abusive to two of their children.
A few days after the plane incident, Jolie filed for divorce, and their separation was finalized in 2019. Pitt has denied the abuse accusations, and while federal authorities investigated, no criminal charges were filed.Recently, Jolie’s legal team submitted new documents to the Los Angeles Superior Court on Thursday, April 4. These papers suggest that Brad Pitt’s physical abuse started earlier than previously thought.CNN obtained a copy of the motion, which states: “While Pitt’s history of physical abuse of Jolie started well before the family’s September 2016 plane trip from France to Los Angeles, this flight marked the first time he turned his physical abuse on the children as well. Jolie then immediately left him.”The papers don’t go into more detail about the alleged abuse but state that Jolie plans to show evidence like testimony, emails, and photos to prove why Pitt was worried about his own behavior. She claims this is why he backed out of the deal to buy her share of their winery, Miraval, because she wouldn’t agree to his new, broad non-disclosure agreement (NDA).It’s also said that Jolie offered to sell her half of the French winery to Pitt, but he would only agree if she signed an NDA. This NDA would have stopped Jolie from talking about Pitt’s abuse of her and their children, except in court, by linking Pitt’s personal reputation to the winery’s business.Pitt’s team have yet to respond to Jolie’s filing alleging abuse earlier than the plane ride from France to LA, but PEOPLE quote a source close to the actor as having said: “This is a pattern of behavior – whenever there is a decision that goes against the other side they consistently choose to introduce misleading, inaccurate and/or irrelevant information as a distraction.“There was a lengthy custody trial that involved the entire history of their relationship and a judge who heard all the evidence still granted him 50/50 custody.”
Her father couldn’t read but still supported her and her family.She stays humble and annually donates millions of dollars.Even though she has amassed massive fame and fortune, Dolly Parton has remained humble amid her stellar career as a musician, businesswoman, and philanthropist. It’s no surprise that success has followed her along the way.As someone who grew up in a large family, Parton understands the struggles of poverty. She is now a highly-influential Hollywood star, and despite her accomplishments, she has never forgotten her humble beginnings.
Dolly Parton poses for a portrait in 1955 in Nashville, Tennessee. | Source: Getty ImagesThe music superstar, whose real name is Dolly Rebecca Parton, was welcomed by her parents on January 19, 1946, in Sevierville, Tennessee, on Locust Ridge. She was born in a one-bedroom cabin and had 11 siblings.Robert Lee Parton, her father, was a sharecropper who couldn’t read or write due to a lack of access to education, and he supplemented his income by working in construction.Growing up, the country legend, raised by a musically-oriented family, was constantly surrounded by music. Despite their difficult living circumstances, they found joy and connected through singing.
Dolly Parton poses for a portrait in 1965 in Nashville, Tennessee. | Source: Getty ImagesParton’s mother, Avie Lee Owens, a performer, taught her daughter how to sing. She played different music for her, like church songs and Elizabethan ballads that had been in her family for generations.Meanwhile, Parton’s grandfather, Jake Robert Owens, was a minister and the composer of the hymn “Singing His Praise.” Several of Parton’s siblings became interested in music, and some worked in her family band.Parton also had an uncle named Sam Owens, a musician and singer-songwriter in his own right. Her uncle loved music and was the first person to notice that she had the potential to become a famous musician when she was a child.
Parton’s siblings include Stella Mae, Cassie Nan, twins Freida Estelle and Rachel Ann, Willadeene, David Wilburn, Coy Denver, Bobby Lee, Robert, and Larry. Robert died in 2021 after a battle with cancer, while Larry died as a newborn.As the fourth among 12 siblings, Parton frequently helped her parents care for the younger children. She lived with her family under one little roof.
At the time, their log cabin only had one bedroom and one living room, and there was no running water or electricity. The property still stands to this day.Parton has always been open about discussing her humble beginnings or how this influenced her views on life. She came from a large family with limited resources, so she is familiar with the challenges of being poor.
Dolly Parton beams in a publicity photo for her 1984 film “Rhinestone.” | Source: Getty ImagesIn an interview with The Guardian in 2016, Parton reminisced about her childhood in the mountains of rural Tennessee, focusing on the early memories that brought her the most joy. She said:“Of course, not everything was perfect, but I prefer to remember the best of times.”She remembered the days spent with her siblings, singing at church, and completing chores she wasn’t particularly fond of. She also reminisced about the tons of laughter she shared with her family.
Parton shared how her brothers and sisters would constantly sing and she would always try to get them to be her backup singers when she tried to pretend to be the lead singer on stage, but they were completely disinterested.Their little house, Parton recalled, was always packed with her siblings, leading to a lot of teasing and bickering. However, despite the chaos, they always stuck together as a family.She added that they spent most of the time outside because the cabin was too small for them to hang out comfortably. The space outside served as an extension for sharing meals, entertainment, and playing games.
Parton said her family was always grateful to have food and a roof over their heads. It was not exactly what they wanted, but her parents always emphasized that there were other families who suffered more than they did. She recalled:“We were poor but I never felt poor.”Despite her family’s modest beginnings, Parton’s passion and musical talent would eventually lead her to become one of the most successful and beloved country music performers of all time.
CHILDHOOD IN POVERTY
Despite having fond memories of her childhood, Parton shared growing up in poverty meant living in tough conditions too. She practically lived in a shack with her family of 14 and had limited access to basic necessities.
In a Playboy magazine interview with journalist Lawrence Grobel in March 1978, she shared that she was only eight years old when she first saw a toilet and bathroom in her aunt’s home and was fascinated by them.Laughing at how innocent and ignorant they were then, Parton shared that she and her siblings were afraid to use the toilet, thinking it would suck them in. “It was just really weird,” she recalled.Bathing every day was not a luxury for Parton and her family. They would often make their own soap, and on occasion, they would pile into the truck and drive to the river to wash in its waters.There was a creek nearby, but the river was their preferred bathing spot, as it was like a “big bath” for all of them. They would swim together and wash each other’s hair while their homemade soap flowed down the river.
Telling a joke about how dirty they were back then, Parton said it would have left a ring around the Little Pigeon River, likening their river bath to a “bathtub.” Bathing in the river was a summertime ritual for them.During the winter, the entire family would have a pan of water to wash with as much as possible. When Grobel asked how many times she and her family would bathe in the winter season, Parton replied:“Well, we bathed once a week whether we needed it or not, as the saying goes.”
Bathing became more important to Parton when she reached high school. She would take a bath every night due to the unhygienic behaviors of her younger siblings during bedtime. She revealed:“The kids peed on me every night. We slept three and four in the bed. I would wash every night. And as soon as I go to bed, the kids would wet on me, and I’d have to get up in the morning and do the same thing.”
Dolly Parton attends the We Are Family Foundation event at Hammerstein Ballroom on November 5, 2019, in New York City. | Source: Getty ImagesUnafraid to share her thoughts about it, Parton explained that even though getting peed on might sound unsanitary to some, the urine was a good source of warmth in the winter.Living in the mountains, she recalled how cold it would get at home and even said it was almost a pleasure to be peed on because the room was as chilly as the outside. She said they would all bundle up in bed.
GIVING AWAY MILLIONS
Despite their poverty, Parton has described her family as happy and rich in other ways. Growing up made her modest, and after she earned millions, she never stopped taking care of people in need, much like her family in her childhood. She remarked:“My family will always be my greatest love. Sometimes it gets lost in the shuffle, but there’s an element of family in everything I do.”Parton said her family inspired her music and her theme park, Dollywood and Dixie Stampede—one of the shows in the park— are intended to enable families to spend time together and enjoy themselves.In 2022, Forbes estimated Parton’s net worth at $375 million, making her a self-made millionaire. Her financial success stemmed mainly from her music publishing ownership rights and her theme park.She controls over 3,000 songs, including the highly acclaimed track “I Will Always Love You,” which she refused to share with Elvis Presley in the 1970s. This decision proved profitable when Whitney Houston covered the song in the 1990s.Parton also receives a publishing fee for her songs when used in movies, broadcasted, or sold. Forbes estimated that her songs are worth $150 million and that she has earned $6 million to $8 million in royalties.However, the music icon’s massive wealth comes from her famous theme park, Dollywood, one of Tennessee’s biggest tourist attractions. It reportedly brings in $3 million a year.The country singer invested in the theme park in 1968, when it was still called Pigeon Forge. She later renamed it “Dollywood,” a play on the word “Hollywood.” The park includes a hotel and a water park.Parton also recently launched a new company called Doggy Parton, which is a play on her famous name. Her love of animals inspired the company, which produces dog toys and clothing lines.Parton’s childhood experiences taught her that sharing her success with others is important. In addition to being a musician and businesswoman, she is active in several charitable and social causes and has donated millions to those in need.In 2016, Parton joined forces with a group of musicians to raise $13 million for the recovery efforts of survivors of the East Tennessee wildfires, which hit the state’s Pigeon Forge and Gatlinburg.Other renowned artists, such as Chris Stapelton, Kenny Rogers, Lauren Alaina, Alison Krauss, Reba McEntire, Cyndi Lauper, and Chris Young, played at the “Smoky Mountains Rise: A Benefit for the My People Fund” concert.In 2017, Parton gave a $1 million gift to the Monroe Carell Jr. Children’s Hospital at Vanderbilt University Medical Center in Nashville after her niece received leukemia treatment from them.In addition to providing financial assistance to those affected by natural disasters, Parton made a significant contribution to the healthcare sector by generously donating a substantial amount of money.She made headlines in 2020 when she donated $1 million to vaccine research during the COVID-19 pandemic, which impacted people worldwide. Her contribution helped in the creation of the Moderna vaccine.Parton is also known for her lifelong dedication to promoting early childhood literacy. Through her non-profit program, Imagination Library, she sends free books to over one million children every month.Inspired by her father’s own experience with illiteracy, in 1995, Parton and Robert Lee founded a non-profit organization to help children learn to read and write. It started in eastern Tennessee, but it has grown and now helps kids in all 50 states and the District of Columbia.The literacy program has reached other countries as well, such as Australia, Canada, and the United Kingdom. In 2018, Parton revealed at the Library of Congress that the program had given out its 100 millionth book.Parton never imagined her campaign would be that successful, only wanting to help her father and her hometown when it started. “But then it just took its own wings, and I guess it was meant to be,” she cheerfully shared.Parton was also happy that her father took great pride in making a meaningful contribution toward something worthwhile. He was able to see the fruits of their labor before passing away in 2000.Furthermore, her aspirations for the Imagination Library are ambitious. She admitted that she has big dreams and wants to give away a total of a billion books within her lifetime.
Even though Parton had a tough childhood, she never forgot how important family and community are. She used her success to give back, donating millions of dollars annually to various charitable causes, including education, health, and disaster relief.Her humble beginnings taught her the value of hard work, determination, and the power of music to bring people together. And as she looks back on her life, she remembers the joy, laughter, and love that filled her childhood home and the family who supported her every step of the way.
Celine Dion Releases Documentary Claiming Meghan Markle Was an Escort When She Met Prince Harry. Celine Dion is set to make waves with her upcoming documentary, **”I Am Celine Dion,”** by revealing shocking claims about Meghan Markle’s past.
The iconic songstress, known for her powerful voice and emotive performances, has announced that the film will provide evidence suggesting Meghan Markle was an escort when she met Prince Harry. This revelation has the potential to shake the foundations of the British royal family and has already captivated the public’s imagination.
Dion, who has lived a life filled with both triumphs and tribulations, is now stepping into the role of a whistleblower. Her documentary, slated for release this fall, will delve into her personal and professional life but has garnered attention for its explosive segment about Meghan Markle.
According to sources close to the production, Dion claims to have irrefutable proof linking Meghan to a high-end escort service that catered to wealthy and influential clients, including Prince Harry.
In one of the documentary’s teasers, Dion is seen holding a folder labeled “Top Secret,” her eyes gleaming with determination as she declares, “The truth must be told.The world deserves to know the real story.” This declaration has set the stage for what could be one of the most explosive royal scandals in recent history.The British royal family has had its fair share of scandals, but this one could be monumental. Meghan Markle, the Duchess of Sussex, has been a polarizing figure ever since joining the royal fold.
Critics accuse her of being manipulative and fame-hungry, while supporters see her as a modern woman challenging outdated traditions. If Dion’s allegations prove true, the repercussions could be significant, not only tarnishing Meghan’s reputation but also questioning the integrity of the royal family’s vetting processes.Skeptics are already questioning the legitimacy of Dion’s claims, given the celebrity gossip industry’s history of fabrications and half-truths.However, insiders suggest that Dion’s evidence is meticulously compiled and difficult to dispute. Key pieces of evidence reportedly include a series of emails exchanged between Meghan and a high-profile client and photographs purportedly showing Meghan in compromising situations.Additionally, interviews with former colleagues and acquaintances of Meghan will be featured, including a detailed and compelling testimony from a woman named Sophie, who claims to have worked alongside Meghan in the escort service.As news of Dion’s documentary spreads, reactions have been mixed. Social media platforms are buzzing with debates and discussions, with hashtags like #MeghanMarkleScandal and #DionDocumentary trending worldwide. Supporters of Meghan Markle accuse Dion of fabricating evidence for publicity, while others eagerly await the documentary’s release, curious to see what revelations it might contain.One user tweeted, “I think Celine’s just looking for attention. This is just another attempt to bring Meghan down because she broke away from the royal family.” On the flip side, another user posted, “If Celine has the receipts, then we deserve to know the truth. No one is above scrutiny.”For Meghan and Harry, the implications of Dion’s documentary could be far-reaching. The couple, who have already stepped back from their royal duties and relocated to the United States, now face a new wave of public scrutiny. How they respond to these allegations could have lasting impacts on their reputation and public standing.
As the world waits for the release of **”I Am Celine Dion,”** one thing is certain: the documentary promises to be as dramatic and captivating as one of Celine Dion’s greatest hits. The truth, whatever it may be, is sure to make headlines.
Keanu Reeves, a beloved actor known for his kindness and action-packed roles, recently shared a concerning incident on “The Late Show with Stephen Colbert.”
Unexpected Accident
While filming his new comedy, “Good Fortune,” Reeves recounted, “I broke my kneecap.” Known for his roles in “The Matrix” and “John Wick,” the injury was surprisingly mundane. Colbert asked, “What happened? Who got to you?” Reeves playfully replied, “No one got to me. Accident got to me.”
The Incident
Reeves explained that the injury occurred after a scene with Aziz Ansari and Seth Rogen. “We were in a cold plunge. I was doing the ‘cold shuffle’ in a room with protective carpets, and my foot got caught in a pocket,” he said. Demonstrating, Reeves added, “My patella, kneecap, cracked like a potato chip.”
Reflecting on Comedy
Colbert clarified, “This was not an action film with Aziz and Rogen.” Reeves confirmed, “No, it was comedy.” Adding humor, he remarked, “Comedy is hard, man,”
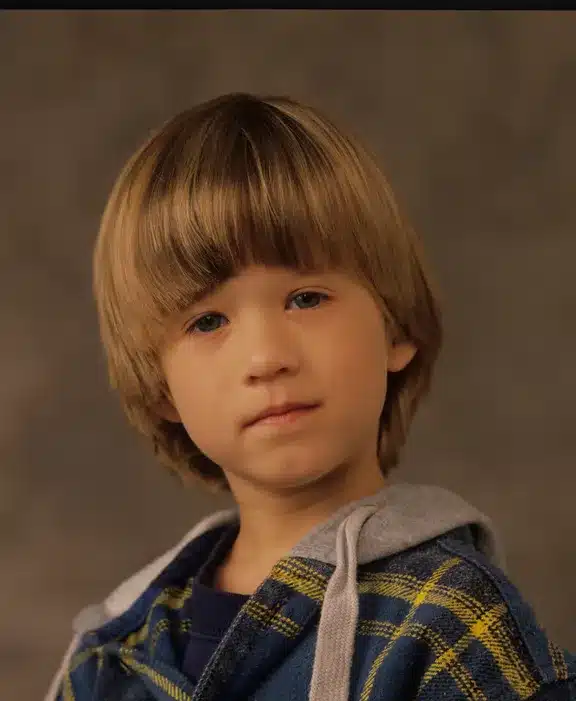
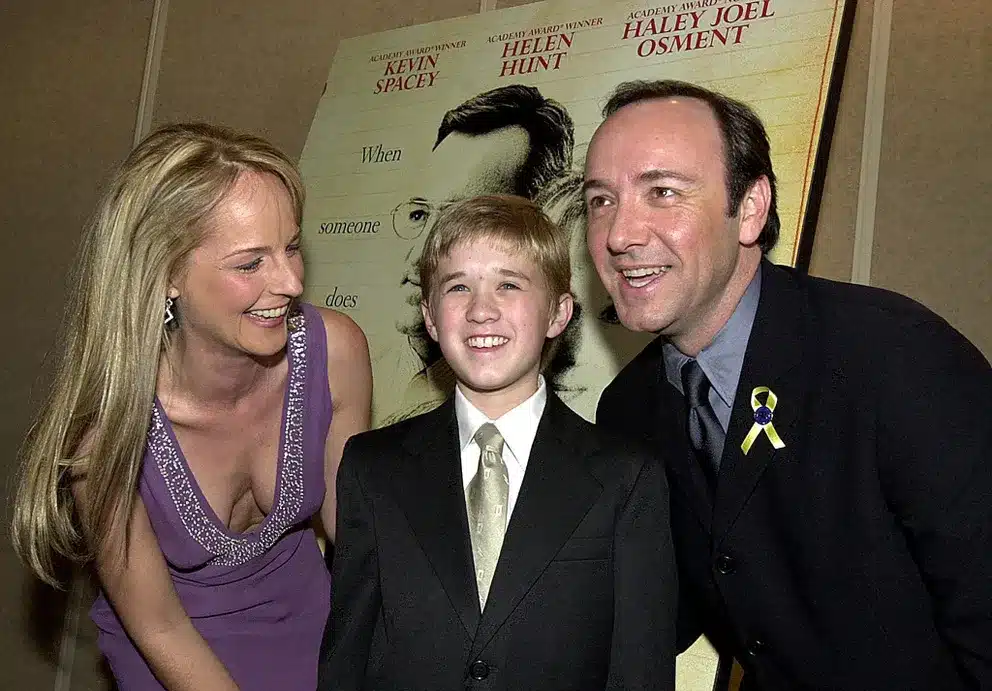
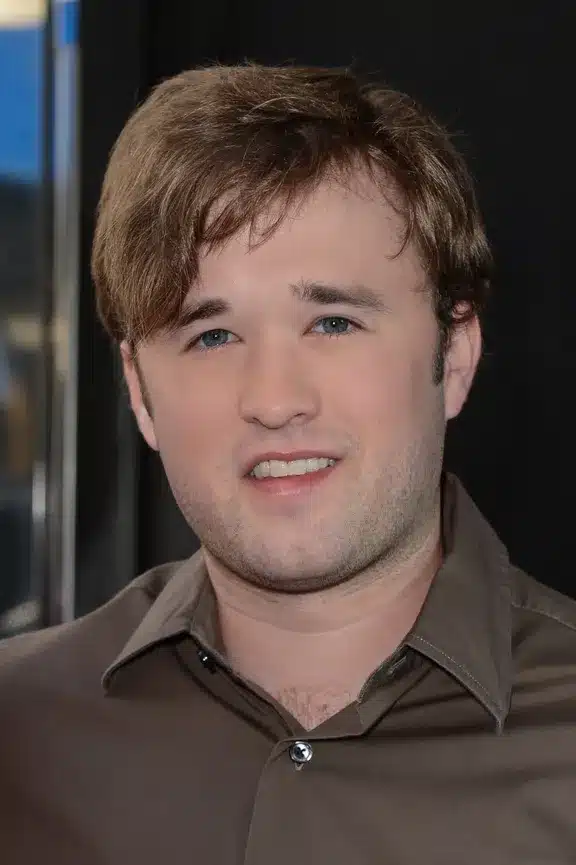
Haley Joel Osment: The Journey from Adolescent Star to Skilled Performer
Once a cherished child star, Haley Joel Osment has changed dramatically over the years. Osment’s path in Hollywood has been remarkable, spanning from his early days as a cherubic-faced actor to his current distinguished image.
Haley Joel Osment: The Journey from Adolescent Star to Skilled Performer
Once a cherished child star, Haley Joel Osment has changed dramatically over the years. Osment’s path in Hollywood has been remarkable, spanning from his early days as a cherubic-faced actor to his current distinguished image.
Early Years: 1994–1997
Despite his youth, Osment demonstrated a great ability to portray intense emotions in the early years of his profession. Critics and fans praised him for his captivating performances, which combined a cherubic countenance and boyish innocence to attract viewers.
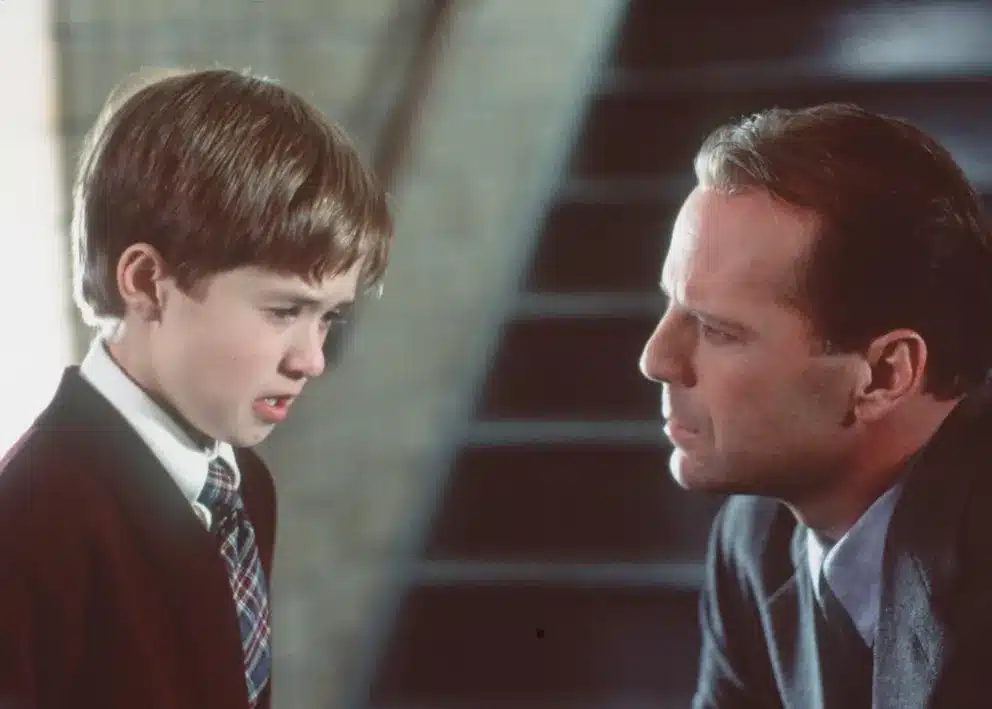
The Turning Point: 1999
With the publication of “The Sixth Sense,” in 1999, Osment’s career underwent a dramatic shift. He became internationally famous and received critical acclaim for his portrayal of a disturbed young child in the movie, making him one of Hollywood’s brightest young stars.
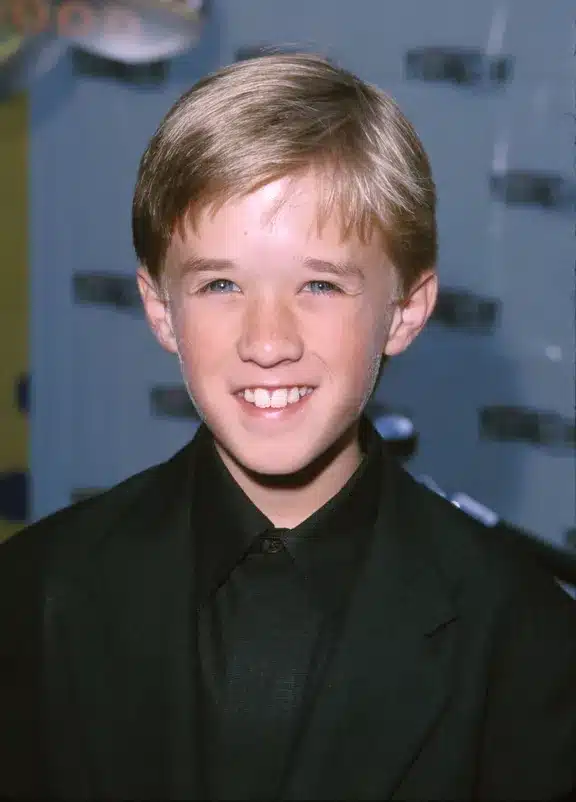
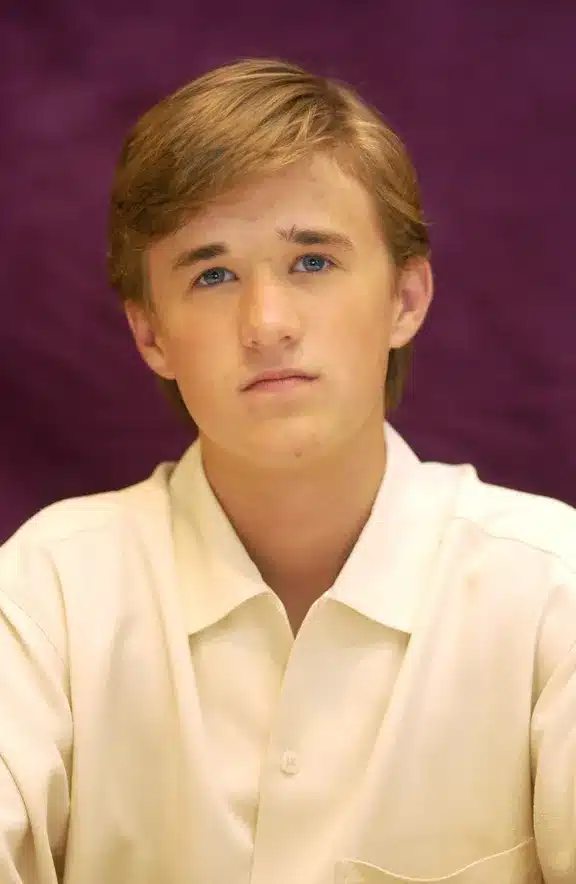
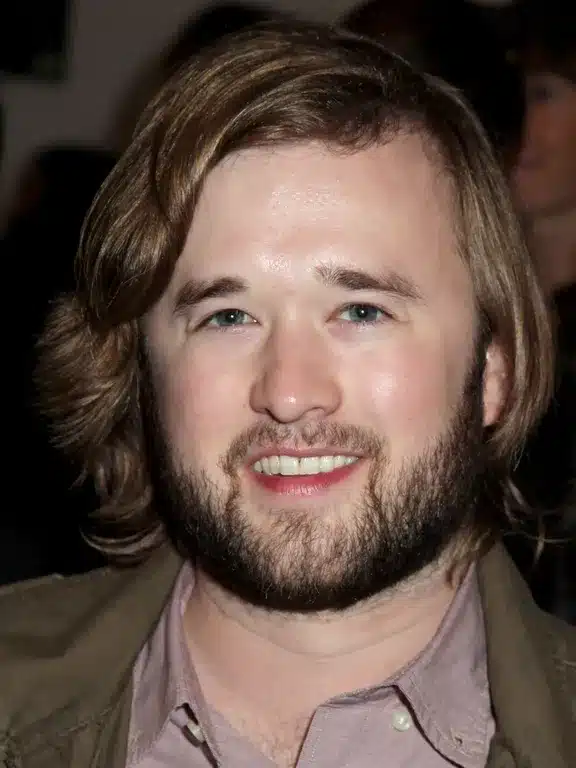
2000s: The Shift to Adulthood
Osment’s roles and appearance started to change as he grew older and more mature. As a nominee, he went to the Academy Awards and kept taking on difficult parts that revealed his range as an actor.
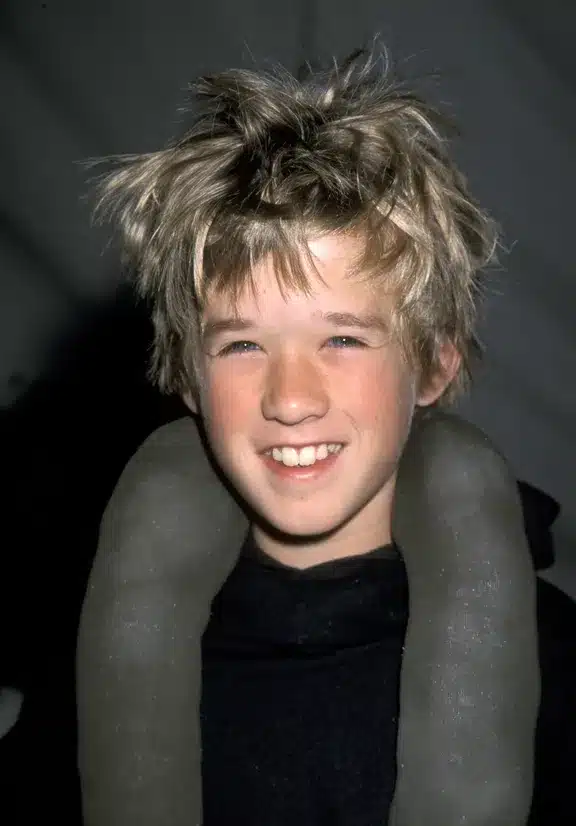
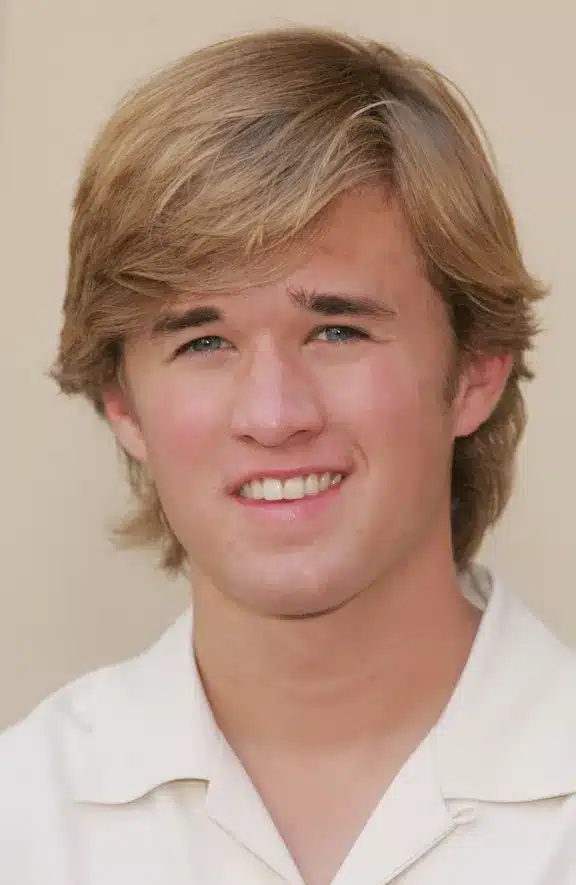
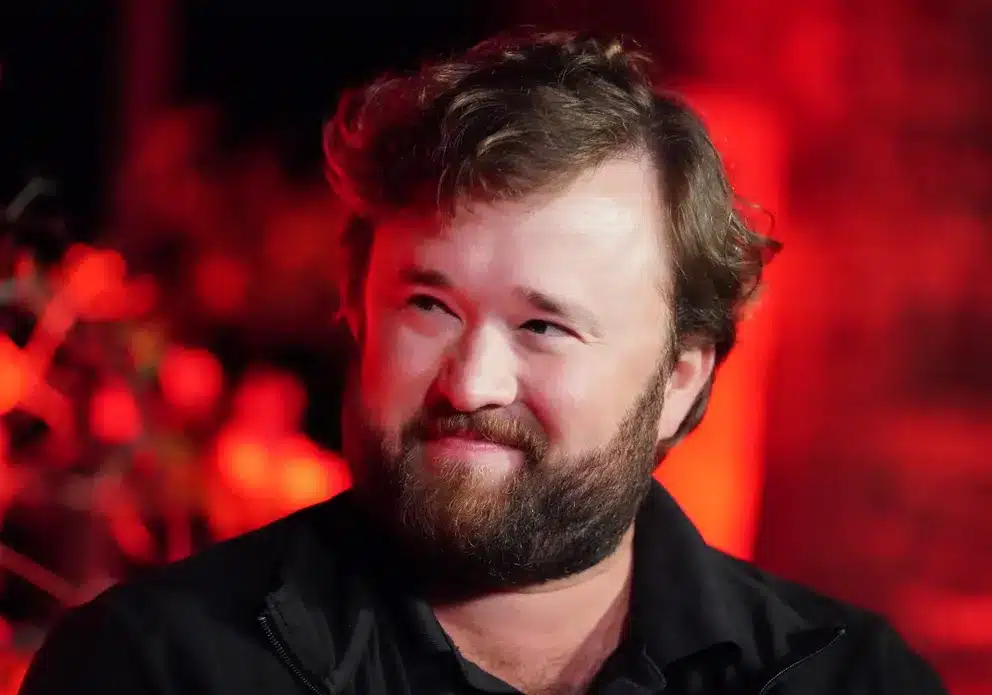
Difficulties and Development: 2006–2012
Osment had difficulties in the middle of the 2000s, including a well-known incident involving drunk driving. But he saw this time as a chance for personal development, and he eventually returned to the public eye with a fresh appreciation for his work.
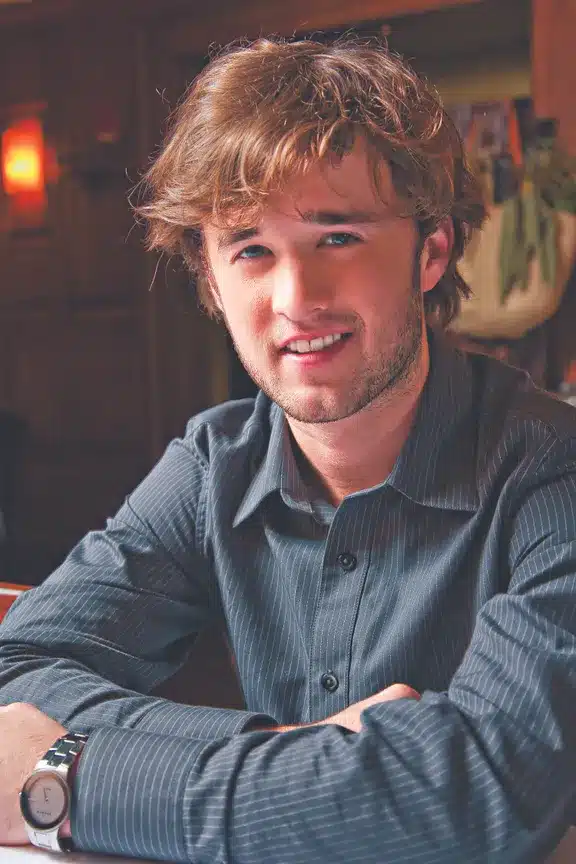
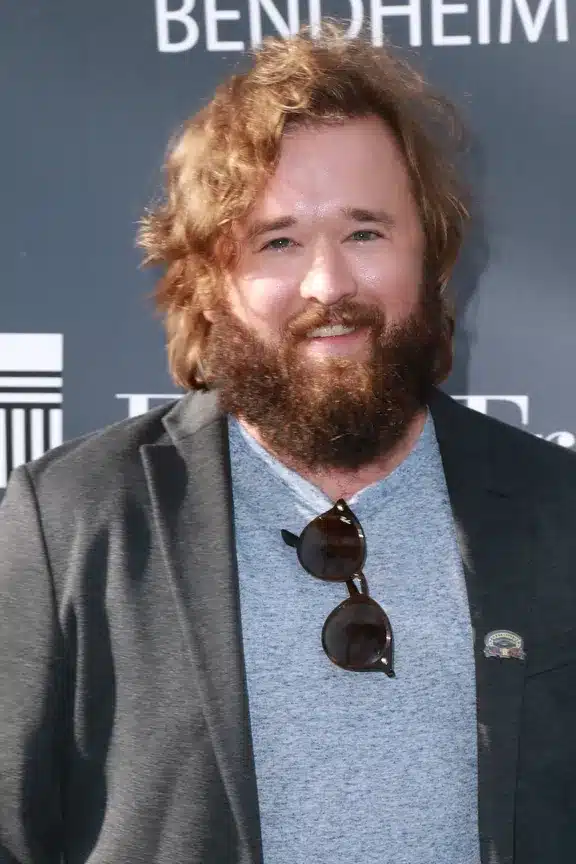
Current Time: 2024
Osment is still very successful in the entertainment business today, having starred in movies and television shows that showcase his range as an actor. With a neat beard and an adult manner, he is still well-liked for his life-changing performances and commitment to his work.
From his early years as a young prodigy to his present position as an accomplished actor, Haley Joel Osment’s path in Hollywood has been marked by development, change, and resiliency. His continuing talent and presence in the industry serve as a monument to his incredible career, which is still evolving as an actor and a person.
When the bespectacled 68-year-old Jenny Darren stepped on to the “Britain’s Got Talent” stage in 2018, the judges were in for a big surprise.
Rather than a ballad, Darren went back to her roots, belting out AC/DC’s ‘Highway To Hell’, rocking out the panel, presenters and audience alike.
Fortunately, when she made this triumphant return to the world of rock, the whole world got to see in a video that has gone viral on the internet, having over 11 million views.
The matured songstress first entered the stage on “Britains Got Talent” wearing a buttoned-up cardigan and looking like the typical grandma that we all know and love. Everyone was in for a shock when she unbuttoned her cardigan and stripped down to a black leather rocker ensemble.
The entire audience, including judges Alesha Dixon, Amanda Holden, David Walliams, and Simon Cowell, were so silent that a pin drop would have been heard in the audience as she began her performance.
While many in the audience were probably expecting something more toned down, they watched in excitement as she began belting out AC/DC’s hit song ‘Highway to Hell’ in true rocker form.
After watching her performance, the audience gave the singer a standing ovation.
Jenny Darren had been into singing since she was just 12 years old and listened to musical greats like Jimmy Page. At one point in her life, she even sang backup vocals for AC/DC and has released 4 albums of her own featuring Nicko McBrian, Iron Maiden’s drummer as reported here by The Radio Times.
After retiring, the Birmingham resident decided it was time to get back into what had made her so happy in the past.
Watch this video to see the full incredible performance.
It may only be rock-n-roll, but Jenny, the audience of “Britain’s Got Talent,” and her new fans from around the world have proven that they definitely like it! Maybe you or your friends need to be reminded that it is always the right time to rock and this amazing performance on video is enough to prove it!